m (→Fisher: selling process description) |
No edit summary Tag: Visual edit |
||
| (121 intermediate revisions by 25 users not shown) | |||
| Line 1: | Line 1: | ||
{{Infobox module |
{{Infobox module |
||
| − | |image = Mycity. |
+ | |image = Mycity logo.png |
|roomname = #mycity |
|roomname = #mycity |
||
|releasedate = June 2017 |
|releasedate = June 2017 |
||
| − | |authors = |
+ | |authors = {{Nickname|Fofinhoppp#0000|id=13616940}} |
| − | |links = |
+ | |links = [https://discord.gg/Uu3CbPf Discord server] |
|earncheese = y |
|earncheese = y |
||
| + | |earntitle = y |
||
| − | }}'''Mycity''' is a [[module]] that is city-like. In it houses can be bought and various jobs and quests are available. |
||
| + | }} |
||
| + | [[File:Mycity.jpg|thumb]] |
||
| + | '''Mycity''' is a [[module]] that is city-like. In it houses can be bought and various jobs and quests are available. |
||
| − | At least 4 players are required for the module to play at non |
+ | At least 4 players are required for the module to play at non-international rooms (en-#mycity[1-9]) and at least 2 players for international rooms (*#mycity[1-9]). |
It was previously available at "#paintball0mycity". |
It was previously available at "#paintball0mycity". |
||
| Line 14: | Line 17: | ||
{{clear}} |
{{clear}} |
||
| + | ==Titles== |
||
| − | ==Locations and characters== |
||
| + | A title was added on 12 January 2022 ({{Version|1.682}}). |
||
| + | {{Title table}} |
||
| + | {{TR|535 |
||
| + | |Tycoon |
||
| + | |a=Spend 5,000,000 coins |
||
| + | }} |
||
| + | |} |
||
| + | |||
| + | ==Characters== |
||
| + | NPCs' (clients) locations on the map, in a broadly clockwise order: |
||
| + | |||
| + | * '''Mine shop''': John |
||
| + | * '''Undeground boat shop''': Blank (accessible only when the path to the boat shop is open) |
||
| + | * '''Mine job site''': Paulo, Heinrich, Rupe |
||
| + | * '''Mine entrance''': Goldie |
||
| + | * '''Jason's Workshop''': Jason (inaccessible at night) |
||
| + | * '''Police station''': Sherlock, Sebastian, Paul, Alexa |
||
| + | * '''Bank''': Colt (inaccessible at night) |
||
| + | * '''Market''': Pablo, Derek, Billy, Gominha, Julie, Natasha, Cassy |
||
| + | * '''Pizzeria''': Louis, Lauren, Marie, *Souris, Kariina |
||
| + | * '''Outside furniture store''': Daniel (upgrade backpack $5000 ,max 70) |
||
| + | * '''Furniture store''': Iho, Chrystian (inaccessible at night) |
||
| + | * '''Fish 'N Bait''': Bill, Patric |
||
| + | * '''Outside potion shop''': Mrsbritt87 |
||
| + | * '''Potion shop''': Indy (inaccessible at night) |
||
| + | * '''Restaurant''': Bruna, Luan, Weth, Gui, Ana, Gabe, Remi, Lucas |
||
| + | * '''Café''': Alicia |
||
| + | * '''Bridge''': Santih |
||
| + | * '''Oliver's house''': Marcus, Oliver, Anny |
||
| + | * '''Dave's tent''': Lindsey, Dave, Kapo |
||
| + | * '''Seed store''': Body (inaccessible at night) |
||
| + | * '''Beehives''': Davi |
||
| + | |||
| + | ==Locations== |
||
[[File:Mycity - not enough players character.png|thumb|A character that appears only when there are not enough players]] |
[[File:Mycity - not enough players character.png|thumb|A character that appears only when there are not enough players]] |
||
A list of locations and the characters in them, from left to right. |
A list of locations and the characters in them, from left to right. |
||
| Line 20: | Line 57: | ||
===Mine=== |
===Mine=== |
||
| − | === |
+ | ===City=== |
{| class="wikitable" |
{| class="wikitable" |
||
| − | !Exterior image |
+ | ! style="width: 100px;" |Exterior image |
| − | !Interior image |
+ | ! style="width: 150px;" |Interior image |
!Name |
!Name |
||
!Characters |
!Characters |
||
| Line 29: | Line 66: | ||
!Notes |
!Notes |
||
|- |
|- |
||
| − | |[[File:Mycity - Jason's Workshop - exterior.png| |
+ | |[[File:Mycity - Jason's Workshop - exterior.png|100px|center]] |
| − | |[[File:Mycity - Jason's Workshop - interior.png| |
+ | |[[File:Mycity - Jason's Workshop - interior.png|150px|center]] |
|"Jason's Workshop" (build shop) |
|"Jason's Workshop" (build shop) |
||
| |
| |
||
| Line 41: | Line 78: | ||
|Can be robbed. |
|Can be robbed. |
||
|- |
|- |
||
| − | |[[File:Mycity - police station - exterior.png| |
+ | |[[File:Mycity - police station - exterior.png|100px|center]] |
| − | |[[File:PoliceStation.png| |
+ | |[[File:PoliceStation.png|150px|center]] |
|Police station |
|Police station |
||
| |
| |
||
{| style="margin: auto;" |
{| style="margin: auto;" |
||
|[[File:Mycity - Sherlock.png|center]] |
|[[File:Mycity - Sherlock.png|center]] |
||
| − | |- |
||
| − | |'''Sherlock''' |
||
| − | |} |
||
| − | {| style="margin: auto;" |
||
| style="text-align:center;" |TBA |
| style="text-align:center;" |TBA |
||
| style="text-align:center;" |TBA |
| style="text-align:center;" |TBA |
||
| style="text-align:center;" |TBA |
| style="text-align:center;" |TBA |
||
|- |
|- |
||
| + | |'''Sherlock''' |
||
|Sebastian |
|Sebastian |
||
|Paul |
|Paul |
||
| Line 62: | Line 96: | ||
|Sherlock gives the cop job. |
|Sherlock gives the cop job. |
||
|- |
|- |
||
| − | |[[File:Mycity - clock tower.png| |
+ | |[[File:Mycity - clock tower.png|100px|center]] |
|{{bc}} |
|{{bc}} |
||
|Clock tower |
|Clock tower |
||
| Line 69: | Line 103: | ||
|Displays the current time of Mycity. Time can also be seen by using the clock item. |
|Displays the current time of Mycity. Time can also be seen by using the clock item. |
||
|- |
|- |
||
| − | |[[File:Mycity - bank - exterior.png| |
+ | |[[File:Mycity - bank - exterior.png|100px|center]] |
| − | |[[File:Mycity - bank - interior.png| |
+ | |[[File:Mycity - bank - interior.png|150px|center]] |
|Bank |
|Bank |
||
| |
| |
||
| Line 81: | Line 115: | ||
|Can be robbed when it closes at night (see {{Section link||Bank robbery}}). |
|Can be robbed when it closes at night (see {{Section link||Bank robbery}}). |
||
|- |
|- |
||
| − | |[[File:Mycity - market - exterior.png| |
+ | |[[File:Mycity - market - exterior.png|100px|center]] |
| − | |[[File:Mycity - market - interior.png| |
+ | |[[File:Mycity - market - interior.png|150px|center]] |
|Market |
|Market |
||
| |
| |
||
| Line 110: | Line 144: | ||
|Can be robbed. For the items sold, see {{Section link||Market}}. Pablo, who is at the right, gives the thief job. |
|Can be robbed. For the items sold, see {{Section link||Market}}. Pablo, who is at the right, gives the thief job. |
||
|- |
|- |
||
| − | |[[File:Mycity - pizzeria - exterior.png| |
+ | |[[File:Mycity - pizzeria - exterior.png|100px|center]] |
| − | |[[File:Mycity - pizzeria - interior.png| |
+ | |[[File:Mycity - pizzeria - interior.png|150px|center]] |
|Pizzeria |
|Pizzeria |
||
| |
| |
||
| Line 130: | Line 164: | ||
|*Souris |
|*Souris |
||
|} |
|} |
||
| − | | style="text-align: center;" |{{ |
+ | | style="text-align: center;" |{{no}} |
|Unlocked after completing quest #4. |
|Unlocked after completing quest #4. |
||
|- |
|- |
||
| − | |[[File:Mycity - hospital - exterior.png| |
+ | |[[File:Mycity - hospital - exterior.png|100px|center]] |
| |
| |
||
{| class="centertext" |
{| class="centertext" |
||
| − | |[[File:Mycity - hospital - interior - 4.png| |
+ | |[[File:Mycity - hospital - interior - 4.png|150px|center]] |
|- |
|- |
||
|4 |
|4 |
||
|- |
|- |
||
| − | |[[File:Mycity - hospital - interior - 3.png| |
+ | |[[File:Mycity - hospital - interior - 3.png|150px|center]] |
|- |
|- |
||
|3 |
|3 |
||
|- |
|- |
||
| − | |[[File:Mycity - hospital - interior - 2.png| |
+ | |[[File:Mycity - hospital - interior - 2.png|150px|center]] |
|- |
|- |
||
|2 |
|2 |
||
|- |
|- |
||
| − | |[[File:Mycity - hospital - interior - 1.png| |
+ | |[[File:Mycity - hospital - interior - 1.png|150px|center]] |
|- |
|- |
||
|1 |
|1 |
||
|- |
|- |
||
| − | |[[File:Mycity - hospital - interior - P.png| |
+ | |[[File:Mycity - hospital - interior - P.png|150px|center]] |
|- |
|- |
||
|P |
|P |
||
| Line 161: | Line 195: | ||
|Players heal here when their food stat is at 0. |
|Players heal here when their food stat is at 0. |
||
|- |
|- |
||
| − | |[[File:Mycity - car dealership - exterior.png| |
+ | |[[File:Mycity - car dealership - exterior.png|100px|center]] |
| − | |[[File:Mycity - car dealership - interior.png| |
+ | |[[File:Mycity - car dealership - interior.png|150px|center]] |
|Car dealership |
|Car dealership |
||
|{{bc}} |
|{{bc}} |
||
| Line 168: | Line 202: | ||
|For the cars sold, see {{Section link||Car dealership}}. |
|For the cars sold, see {{Section link||Car dealership}}. |
||
|- |
|- |
||
| − | |[[File:Mycity - furniture store - exterior.png| |
+ | |[[File:Mycity - furniture store - exterior.png|100px|center]] |
| − | |[[File:Mycity - furniture store - interior.png| |
+ | |[[File:Mycity - furniture store - interior.png|150px|center]] |
|Furniture store |
|Furniture store |
||
| |
| |
||
| Line 182: | Line 216: | ||
|For the items sold, see {{Section link||Furniture store}}. |
|For the items sold, see {{Section link||Furniture store}}. |
||
|- |
|- |
||
| − | |[[File:FishShop.png| |
+ | |[[File:FishShop.png|100px|center]] |
| − | |[[File:Place fishShop.png| |
+ | |[[File:Place fishShop.png|150px|center]] |
|Fish 'N Bait |
|Fish 'N Bait |
||
| |
| |
||
{| style="margin: auto;" |
{| style="margin: auto;" |
||
|[[File:Mycity - Patric.png|center]] |
|[[File:Mycity - Patric.png|center]] |
||
| + | |[[File:Bill.png|center]] |
||
|- |
|- |
||
|'''Patric''' |
|'''Patric''' |
||
| − | |} |
||
| − | {| style="margin: auto;" |
||
| − | |[[File:Bill.png|thumb|60x60px]] |
||
| − | |- |
||
|Bill |
|Bill |
||
|} |
|} |
||
| Line 200: | Line 231: | ||
|} |
|} |
||
| − | === |
+ | ===Island=== |
| − | To access the |
+ | To access the island, players need a boat, which is obtained after completing 1 quest. |
{| class="wikitable" |
{| class="wikitable" |
||
| − | !Exterior image |
+ | ! style="width: 100px;" |Exterior image |
| − | !Interior image |
+ | ! style="width: 150px;" |Interior image |
!Name |
!Name |
||
!Characters |
!Characters |
||
| Line 211: | Line 242: | ||
!Notes |
!Notes |
||
|- |
|- |
||
| − | |[[File:Mycity - potion shop - exterior.png| |
+ | |[[File:Mycity - potion shop - exterior.png|100px|center]] |
| − | |[[File:PotionShop.png| |
+ | |[[File:PotionShop.png|150px|center]] |
|Potion shop |
|Potion shop |
||
| |
| |
||
| Line 223: | Line 254: | ||
|For the items sold, see {{Section link||Potion shop}}. |
|For the items sold, see {{Section link||Potion shop}}. |
||
|- |
|- |
||
| − | |[[File:Mycity - café - exterior.png| |
+ | |[[File:Mycity - café - exterior.png|100px|center]] |
| − | |[[File:Mycity - café - interior.png| |
+ | |[[File:Mycity - café - interior.png|150px|center]] |
|Café |
|Café |
||
| |
| |
||
| Line 235: | Line 266: | ||
|Can be robbed. For the items sold, see {{Section link||Café}}. |
|Can be robbed. For the items sold, see {{Section link||Café}}. |
||
|- |
|- |
||
| − | |[[File:Mycity - seed store - exterior.png| |
+ | |[[File:Mycity - seed store - exterior.png|100px|center]] |
| − | |[[File:Mycity - seed store - interior.png| |
+ | |[[File:Mycity - seed store - interior.png|150px|center]] |
|"Seeds" (seed store) |
|"Seeds" (seed store) |
||
| |
| |
||
| Line 247: | Line 278: | ||
|For the items sold, see {{Section link||Seed store}}. |
|For the items sold, see {{Section link||Seed store}}. |
||
|- |
|- |
||
| − | |[[File:Mycity - Oliver's house - exterior.png| |
+ | |[[File:Mycity - Oliver's house - exterior.png|100px|center]] |
| − | |[[File:Mycity - Oliver's house - interior.png| |
+ | |[[File:Mycity - Oliver's house - interior.png|150px|center]] |
|Oliver's house |
|Oliver's house |
||
| |
| |
||
| Line 254: | Line 285: | ||
|[[File:Mycity - Oliver.png|center]] |
|[[File:Mycity - Oliver.png|center]] |
||
|[[File:Mycity - Marcus.png|center]] |
|[[File:Mycity - Marcus.png|center]] |
||
| − | |[[File:Anny.png| |
+ | |[[File:Anny.png|center]] |
|- |
|- |
||
|Oliver |
|Oliver |
||
| Line 263: | Line 294: | ||
|Has a garden with 4 farming plots. Oliver gives the farmer job. For Marcus's shop, see {{Section link||QP shop}}. Anny gives flour for wheat. |
|Has a garden with 4 farming plots. Oliver gives the farmer job. For Marcus's shop, see {{Section link||QP shop}}. Anny gives flour for wheat. |
||
|- |
|- |
||
| + | |[[File:Dvv.png|218x218px]] |
||
| − | |TBA |
||
|TBA |
|TBA |
||
|Dave's Tent |
|Dave's Tent |
||
| Line 275: | Line 306: | ||
|} |
|} |
||
| style="text-align: center;" |{{no}} |
| style="text-align: center;" |{{no}} |
||
| − | |For items, see |
+ | |For items, see {{Section link||Dave's Tent}}. |
|} |
|} |
||
| + | |||
| + | ==Controls== |
||
| + | * B : Bag |
||
| + | * Q : Quest |
||
| + | * F : Car - jump up to get out of the car |
||
| + | * G : Boat - click on the ground to get out of the boat |
||
| + | * P : Profile |
||
==Jobs== |
==Jobs== |
||
| Line 315: | Line 353: | ||
To deliver an order you need to stand next to character who placed the order and click on them (you need to have a wanted dish in your bag). Orders can be found on the orders screen at the restaurant. |
To deliver an order you need to stand next to character who placed the order and click on them (you need to have a wanted dish in your bag). Orders can be found on the orders screen at the restaurant. |
||
| − | {{clear}} |
+ | {{clear}}<br /> |
| − | |||
===Farmer=== |
===Farmer=== |
||
<infobox> |
<infobox> |
||
| Line 330: | Line 367: | ||
<data><label>Money</label> |
<data><label>Money</label> |
||
<default>$10–10000 per sold seed</default></data> |
<default>$10–10000 per sold seed</default></data> |
||
| − | </infobox>Farmers can plant seeds and harvest plants on the farming plots available at Oliver's garden or their houses. For players to plant or harvest at their own houses it is not required to be a farmer. |
+ | </infobox>Farmers can plant seeds and harvest plants on the farming plots available at Oliver's garden or their houses. You can buy random seeds at the Seed Store. For players to plant or harvest at their own houses it is not required to be a farmer. |
| − | + | In the house you can activate the build mode by clicking to the house icon on mycity module menu. |
|
| + | |||
| + | And there you able to choose which plot do you want to place. (Pool which costs 4000$ or Garden which costs 4000$) |
||
| + | |||
| + | They also can sell seeds by clicking "Drop" in their inventory (Oliver and Lindsey) |
||
| + | |||
| + | '''Selling price''' |
||
| + | |||
| + | {| class="wikitable" |
||
| + | !Image |
||
| + | !Name |
||
| + | !Price |
||
| + | |- |
||
| + | |[[File:Mycity - Tomato seed.png]] |
||
| + | |Tomato seed |
||
| + | | style="text-align:center;" |$10 |
||
| + | |- |
||
| + | |[[File:Mycity - Oregano seed.png]] |
||
| + | |Oregano seed |
||
| + | | style="text-align:center;" |$30 |
||
| + | |- |
||
| + | |[[File:Mycity - Wheat seed.png]] |
||
| + | |Wheat seed |
||
| + | | style="text-align:center;" |$40 |
||
| + | |- |
||
| + | |[[File:PepperSeed.png]] |
||
| + | |Pepper seed |
||
| + | | style="text-align:center;" |$70 |
||
| + | |- |
||
| + | |[[File:Mycity - Lemon seed.png]] |
||
| + | |Lemon seed |
||
| + | | style="text-align:center;" |$120 |
||
| + | |- |
||
| + | |[[File:Mycity - Blueberry seed.png]] |
||
| + | |Blueberry seed |
||
| + | | style="text-align:center;" |$400 |
||
| + | |- |
||
| + | |[[File:BananaSeedling.png]] |
||
| + | |Banana Seedling |
||
| + | | style="text-align:center;" |$800 |
||
| + | |- |
||
| + | |[[File:Mycity - Pumpkin seed.png]] |
||
| + | |Pumpkin seed |
||
| + | | style="text-align:center;" |$500 |
||
| + | |- |
||
| + | |[[File:Mycity - Lucky Flower seed.png]] |
||
| + | |Lucky Flower seed |
||
| + | | style="text-align:center;" |$10,000 |
||
| + | |} |
||
{{clear}} |
{{clear}} |
||
| + | |||
===Fisher=== |
===Fisher=== |
||
<infobox> |
<infobox> |
||
| Line 351: | Line 437: | ||
Players also can sell fish to Patric by clicking "Drop" in their inventory. |
Players also can sell fish to Patric by clicking "Drop" in their inventory. |
||
| + | |||
| + | Island, Santih "Here are a lot of people that still dare to fish in this pond." |
||
'''Selling price''' |
'''Selling price''' |
||
| Line 362: | Line 450: | ||
|- |
|- |
||
|44 |
|44 |
||
| − | |[[File:Mycity - Smolt Fry.png]] |
+ | |[[File:Gfsa.png|56x56px]][[File:Mycity - Smolt Fry.png]] |
| − | | style="text-align: left;" | |
+ | | style="text-align: left;" |Smolty |
|$15 |
|$15 |
||
|Common |
|Common |
||
| + | |- |
||
| + | | |
||
| + | |[[File:Mdd.png|59x59px]] |
||
| + | |Mud Fish |
||
| + | |$15 |
||
| + | |Common |
||
| + | |- |
||
| + | | |
||
| + | |[[File:Skkt.png|59x59px]] |
||
| + | |Sink Fish |
||
| + | |$15 |
||
| + | |Common |
||
| + | |- |
||
| + | | |
||
| + | |[[File:Btt.png|60x60px]] |
||
| + | |Bitty Fish |
||
| + | |$300 |
||
| + | |Rare |
||
|- |
|- |
||
|45 |
|45 |
||
| Line 374: | Line 480: | ||
|- |
|- |
||
|46 |
|46 |
||
| − | |[[File:Mycity - Dog Fish.png]] |
+ | |[[File:Dg.png|51x51px]][[File:Mycity - Dog Fish.png]] |
| style="text-align: left;" |Dog Fish |
| style="text-align: left;" |Dog Fish |
||
|$300 |
|$300 |
||
| Line 380: | Line 486: | ||
|- |
|- |
||
|47 |
|47 |
||
| − | |[[File:Mycity - Cat Fish.png]] |
+ | |[[File:Ct.png|62x62px]][[File:Mycity - Cat Fish.png]] |
| style="text-align: left;" |Cat Fish |
| style="text-align: left;" |Cat Fish |
||
|$300 |
|$300 |
||
| Line 386: | Line 492: | ||
|- |
|- |
||
|48 |
|48 |
||
| − | |[[File:Mycity - Runty Guppy.png]] |
+ | |[[File:Gp.png|59x59px]][[File:Mycity - Runty Guppy.png]] |
| − | | style="text-align: left;" | |
+ | | style="text-align: left;" |Guppy |
|$50 |
|$50 |
||
|Common |
|Common |
||
|- |
|- |
||
|49 |
|49 |
||
| − | |[[File:Mycity - Lobster.png]] |
+ | |[[File:Lb.png|60x60px]][[File:Mycity - Lobster.png]] |
| style="text-align: left;" |Lobster |
| style="text-align: left;" |Lobster |
||
|$1000 |
|$1000 |
||
| Line 409: | Line 515: | ||
|Common |
|Common |
||
|} |
|} |
||
| + | * ''Cheese'' |
||
| + | * ''Wheat Seed'' |
||
{{clear}} |
{{clear}} |
||
| Line 424: | Line 532: | ||
</group> |
</group> |
||
<data><label>Money</label> |
<data><label>Money</label> |
||
| − | <default>$ |
+ | <default>$200 - $</default></data> |
| + | </infobox>Miners can mine blocks with numbers by clicking on them. Sometimes blocks can contain ores. Not all blocks can be clicked, however, each block needs a certain number of clicks to be destroyed. The Ores can be sold to Goldie. |
||
| − | </infobox>Miners can mine by pressing {{Key|Spacebar}} on places where is gold ([[File:Mycity - Gold.png]]). However, they must have a pickaxe for every time they mine. |
||
| − | Upon pressing {{Key|Spacebar}}, the screen changes to squares, which can be clicked to reveal whether there is gold behind it. Not all can be clicked, however, only a limited number, after which the screen disappears and the pickaxe is removed from the bag, needing another to be bought to mine again. |
||
| + | '''Ores''' |
||
| − | The gold nuggets can be sold to Goldie, who is at mine area 1, for $115 each. |
||
| + | {| class="wikitable" |
||
| + | !Image |
||
| + | !Name |
||
| + | !Worth |
||
| + | |- |
||
| + | |[[File:Crystal yellow.png]] |
||
| + | |Yellow Crystal |
||
| + | | style="text-align:center;" |$200 |
||
| + | |- |
||
| + | |[[File:Crystal blue.png]] |
||
| + | |Blue Crystal |
||
| + | | style="text-align:center;" |$342 |
||
| + | |- |
||
| + | |[[File:Crystal purple.png]] |
||
| + | |Purple Crystal |
||
| + | | style="text-align:center;" |$600 |
||
| + | |- |
||
| + | |[[File:Crystal green.png]] |
||
| + | |Green Crystal |
||
| + | | style="text-align:center;"|$800 |
||
| + | |- |
||
| + | |[[File:Crystal red.png]] |
||
| + | |Red Crystal |
||
| + | | style="text-align:center;" |$1200 |
||
| + | |- |
||
| + | |[[File:Mycity - Gold.png]] |
||
| + | |Gold |
||
| + | | style="text-align:center;" |$115 |
||
| + | |} |
||
| + | |||
| + | '''Blocks''' |
||
| + | {| class="wikitable sortable" style="text-align:center" |
||
| + | !Image/color |
||
| + | !Name |
||
| + | !Click |
||
| + | !Note |
||
| + | |- |
||
| + | |[[File:Sand-0.png]] |
||
| + | |Sand |
||
| + | | style="text-align:center;" |2 |
||
| + | |{{bc}} |
||
| + | |- |
||
| + | |[[File:Dirt.jpg]] |
||
| + | |Dirt |
||
| + | | style="text-align:center;" |5 |
||
| + | |{{bc}} |
||
| + | |- |
||
| + | |[[File:Coal.png]] |
||
| + | |Coal |
||
| + | | style="text-align:center;" |20 |
||
| + | |Yellow and blue crystals can be found in these blocks |
||
| + | |- |
||
| + | |[[File:Stone-0.png]] |
||
| + | |Stone |
||
| + | | style="text-align:center;" |50 |
||
| + | |Yellow, blue and purple crystals can be found in these blocks |
||
| + | |- |
||
| + | |[[File:Lava-0.png]] |
||
| + | |Lava |
||
| + | | style="text-align:center;" |200 |
||
| + | |Yellow and blue crystals can occasionally be found in these blocks, purple and green are more common |
||
| + | |- |
||
| + | |[[File:Diamond.jpg]] |
||
| + | |Diamond |
||
| + | | style="text-align:center;" |500 |
||
| + | |Green and red crystals can be found in these blocks, but also occasionally purple, blue and yellow crystals |
||
| + | |- |
||
| + | |[[File:Tiplonium.png]] |
||
| + | |Tiplonium |
||
| + | | style="text-align:center;" |1000 |
||
| + | |Mostly red but also all other types of crystals can be found in these blocks |
||
| + | |- |
||
| + | |[[File:Ore1.png]] |
||
| + | |??? |
||
| + | | style="text-align:center;" |2000 |
||
| + | | |
||
| + | |- |
||
| + | |[[File:Ore2.png]] |
||
| + | |??? |
||
| + | | style="text-align:center;" |5000 |
||
| + | | |
||
| + | |} |
||
{{clear}} |
{{clear}} |
||
| + | |||
===Thief=== |
===Thief=== |
||
<infobox> |
<infobox> |
||
| Line 447: | Line 637: | ||
*$250 per shop robbery |
*$250 per shop robbery |
||
*$1100 per bank robbery</default></data> |
*$1100 per bank robbery</default></data> |
||
| + | </infobox> |
||
| − | </infobox>The "Submit" button to become a robber only works if there is at least 1 cop in the room. But, fortunately, due to an update, this is not the case anymore. |
||
| − | |||
Their nicknames are white (default color) but red during a robbery timer. |
Their nicknames are white (default color) but red during a robbery timer. |
||
| − | |||
| − | When there are no cops anymore, any robbers that there are in the room lose their robber job. But, fortunately, due to an update, this is not the case anymore. |
||
After a robbery, a timer appears until the robber receives the money. Robbers can only be arrested by cops during this timer. During it, robbers cannot enter the mine and Oliver's house. |
After a robbery, a timer appears until the robber receives the money. Robbers can only be arrested by cops during this timer. During it, robbers cannot enter the mine and Oliver's house. |
||
| Line 467: | Line 654: | ||
A list of characters that can be robbed and the shops they are inside is below. |
A list of characters that can be robbed and the shops they are inside is below. |
||
| − | {| class="wikitable" |
+ | {| class="wikitable " |
| − | !Exterior image |
+ | ! style="width: 125px;" |Exterior image |
| − | !Interior image |
+ | ! style="width: 125px;" |Interior image |
!Name |
!Name |
||
!Characters |
!Characters |
||
| Line 520: | Line 707: | ||
|Lauren |
|Lauren |
||
|} |
|} |
||
| − | | style="text-align: center;" |{{ |
+ | | style="text-align: center;" |{{yes}} |
|- |
|- |
||
|[[File:Mycity - Restaurant.png|125px|center]] |
|[[File:Mycity - Restaurant.png|125px|center]] |
||
| Line 531: | Line 718: | ||
|Weth |
|Weth |
||
|} |
|} |
||
| − | | style="text-align: center;" |{{ |
+ | | style="text-align: center;" |{{yes}} |
|} |
|} |
||
| Line 557: | Line 744: | ||
The items can be accessed by clicking the bag ([[File:Mycity - bag.png]]) at the bottom of the screen. |
The items can be accessed by clicking the bag ([[File:Mycity - bag.png]]) at the bottom of the screen. |
||
| − | {| class="wikitable sortable centertext" |
+ | {| class="wikitable sortable centertext" style="text-align:center" |
! style="width: 50px;" |ID |
! style="width: 50px;" |ID |
||
! style="width: 50px;" class="unsortable" |Image |
! style="width: 50px;" class="unsortable" |Image |
||
| + | !Name |
||
| − | ! style="width: 200px;" |Name |
||
! style="width: 75px;" |Still available |
! style="width: 75px;" |Still available |
||
! style="width: 75px;" |Plant |
! style="width: 75px;" |Plant |
||
| Line 566: | Line 753: | ||
|1 |
|1 |
||
|[[File:Mycity - Sprite.png]] |
|[[File:Mycity - Sprite.png]] |
||
| + | |Sprite |
||
| − | | style="text-align: left;" |Sprite |
||
|{{yes}} |
|{{yes}} |
||
|{{no}} |
|{{no}} |
||
| Line 572: | Line 759: | ||
|2 |
|2 |
||
|[[File:Mycity - Fanta.png]] |
|[[File:Mycity - Fanta.png]] |
||
| + | |Fanta |
||
| − | | style="text-align: left;" |Fanta |
||
|{{yes}} |
|{{yes}} |
||
|{{no}} |
|{{no}} |
||
| Line 578: | Line 765: | ||
|3 |
|3 |
||
|[[File:Mycity - Coca-Cola.png]] |
|[[File:Mycity - Coca-Cola.png]] |
||
| − | + | |Coca-Cola |
|
|{{yes}} |
|{{yes}} |
||
|{{no}} |
|{{no}} |
||
| Line 584: | Line 771: | ||
|4 |
|4 |
||
|[[File:Mycity - Pickaxe.png]] |
|[[File:Mycity - Pickaxe.png]] |
||
| − | + | |Pickaxe |
|
| − | |{{ |
+ | |{{no}} |
|{{no}} |
|{{no}} |
||
|- |
|- |
||
|5 |
|5 |
||
|[[File:Mycity - Clock.png]] |
|[[File:Mycity - Clock.png]] |
||
| + | |Clock |
||
| − | | style="text-align: left;" |Clock |
||
|{{yes}} |
|{{yes}} |
||
|{{no}} |
|{{no}} |
||
| Line 596: | Line 783: | ||
|6 |
|6 |
||
|[[File:Mycity - Milk bottle.png]] |
|[[File:Mycity - Milk bottle.png]] |
||
| − | + | |Milk bottle |
|
|{{yes}} |
|{{yes}} |
||
|{{no}} |
|{{no}} |
||
| Line 602: | Line 789: | ||
|7 |
|7 |
||
|[[File:Mycity - Gold.png]] |
|[[File:Mycity - Gold.png]] |
||
| + | |Gold |
||
| − | | style="text-align: left;" |Gold |
||
|{{no}} |
|{{no}} |
||
|{{no}} |
|{{no}} |
||
| Line 608: | Line 795: | ||
|8 |
|8 |
||
|[[File:Mycity - Dynamite.png]] |
|[[File:Mycity - Dynamite.png]] |
||
| − | + | |Dynamite |
|
|{{yes}} |
|{{yes}} |
||
|{{no}} |
|{{no}} |
||
| Line 614: | Line 801: | ||
|9 |
|9 |
||
|[[File:Mycity - Shrink Potion.png]] |
|[[File:Mycity - Shrink Potion.png]] |
||
| − | + | |Shrink Potion |
|
|{{yes}} |
|{{yes}} |
||
|{{no}} |
|{{no}} |
||
| Line 620: | Line 807: | ||
|10 |
|10 |
||
|[[File:Mycity - Growth Potion.png]] |
|[[File:Mycity - Growth Potion.png]] |
||
| − | + | |Growth Potion |
|
|{{yes}} |
|{{yes}} |
||
|{{no}} |
|{{no}} |
||
| Line 626: | Line 813: | ||
|11 |
|11 |
||
|[[File:Mycity - Coffee.png]] |
|[[File:Mycity - Coffee.png]] |
||
| + | |Coffee |
||
| − | | style="text-align: left;" |Coffee |
||
|{{yes}} |
|{{yes}} |
||
|{{no}} |
|{{no}} |
||
| Line 632: | Line 819: | ||
|12 |
|12 |
||
|[[File:HotChocolate.png]] |
|[[File:HotChocolate.png]] |
||
| − | + | |Hot Chocolate |
|
|{{yes}} |
|{{yes}} |
||
|{{no}} |
|{{no}} |
||
| Line 638: | Line 825: | ||
|13 |
|13 |
||
|[[File:Milkshake.png]] |
|[[File:Milkshake.png]] |
||
| − | + | |Milkshake |
|
|{{yes}} |
|{{yes}} |
||
|{{no}} |
|{{no}} |
||
| Line 644: | Line 831: | ||
|14 |
|14 |
||
|[[File:Mycity - Seed.png]] |
|[[File:Mycity - Seed.png]] |
||
| + | |Seed |
||
| − | | style="text-align: left;" |Seed |
||
|{{yes}} |
|{{yes}} |
||
|{{no}} |
|{{no}} |
||
| Line 650: | Line 837: | ||
|15 |
|15 |
||
|[[File:Mycity - Fertilizer.png]] |
|[[File:Mycity - Fertilizer.png]] |
||
| − | + | |Fertilizer |
|
|{{yes}} |
|{{yes}} |
||
|{{no}} |
|{{no}} |
||
| Line 656: | Line 843: | ||
|16 |
|16 |
||
|[[File:Mycity - Water bucket.png]] |
|[[File:Mycity - Water bucket.png]] |
||
| − | + | |Water bucket |
|
|{{yes}} |
|{{yes}} |
||
|{{no}} |
|{{no}} |
||
| Line 662: | Line 849: | ||
|17 |
|17 |
||
|[[File:Mycity - Tomato.png]] |
|[[File:Mycity - Tomato.png]] |
||
| + | |Tomato |
||
| − | | style="text-align: left;" |Tomato |
||
|{{yes}} |
|{{yes}} |
||
| rowspan="2" |{{yes}} |
| rowspan="2" |{{yes}} |
||
| Line 668: | Line 855: | ||
|18 |
|18 |
||
|[[File:Mycity - Tomato seed.png]] |
|[[File:Mycity - Tomato seed.png]] |
||
| − | + | |Tomato seed |
|
|{{yes}} |
|{{yes}} |
||
|- |
|- |
||
|19 |
|19 |
||
|[[File:Mycity - Oregano.png]] |
|[[File:Mycity - Oregano.png]] |
||
| − | + | |Oregano |
|
|{{yes}} |
|{{yes}} |
||
| rowspan="2" |{{yes}} |
| rowspan="2" |{{yes}} |
||
| Line 679: | Line 866: | ||
|20 |
|20 |
||
|[[File:Mycity - Oregano seed.png]] |
|[[File:Mycity - Oregano seed.png]] |
||
| − | + | |Oregano seed |
|
|{{yes}} |
|{{yes}} |
||
|- |
|- |
||
|21 |
|21 |
||
|[[File:Mycity - Lemon.png]] |
|[[File:Mycity - Lemon.png]] |
||
| + | |Lemon |
||
| − | | style="text-align: left;" |Lemon |
||
|{{yes}} |
|{{yes}} |
||
| rowspan="2" |{{yes}} |
| rowspan="2" |{{yes}} |
||
| Line 690: | Line 877: | ||
|22 |
|22 |
||
|[[File:Mycity - Lemon seed.png]] |
|[[File:Mycity - Lemon seed.png]] |
||
| − | + | |Lemon seed |
|
|{{yes}} |
|{{yes}} |
||
|- |
|- |
||
|23 |
|23 |
||
|[[File:Mycity - Salt.png]] |
|[[File:Mycity - Salt.png]] |
||
| + | |Salt |
||
| − | | style="text-align: left;" |Salt |
||
|{{yes}} |
|{{yes}} |
||
|{{no}} |
|{{no}} |
||
| Line 701: | Line 888: | ||
|24 |
|24 |
||
|[[File:Mycity - Pepper.png]] |
|[[File:Mycity - Pepper.png]] |
||
| + | |Pepper |
||
| − | | style="text-align: left;" |Pepper |
||
|{{yes}} |
|{{yes}} |
||
| rowspan="2" |{{yes}} |
| rowspan="2" |{{yes}} |
||
| Line 707: | Line 894: | ||
|25 |
|25 |
||
|[[File:PepperSeed.png]] |
|[[File:PepperSeed.png]] |
||
| − | + | |Pepper seed |
|
|{{yes}} |
|{{yes}} |
||
|- |
|- |
||
|26 |
|26 |
||
|[[File:Mycity - Lucky Flower.png]] |
|[[File:Mycity - Lucky Flower.png]] |
||
| − | + | |Lucky Flower |
|
|{{yes}} |
|{{yes}} |
||
| rowspan="2" |{{yes}} |
| rowspan="2" |{{yes}} |
||
| Line 718: | Line 905: | ||
|27 |
|27 |
||
|[[File:Mycity - Lucky Flower seed.png]] |
|[[File:Mycity - Lucky Flower seed.png]] |
||
| − | + | |Lucky Flower seed |
|
|{{yes}} |
|{{yes}} |
||
|- |
|- |
||
|28 |
|28 |
||
|[[File:Sauce.png]] |
|[[File:Sauce.png]] |
||
| + | |Sauce |
||
| − | | style="text-align: left;" |Sauce |
||
|{{yes}} |
|{{yes}} |
||
|{{no}} |
|{{no}} |
||
| Line 729: | Line 916: | ||
|29 |
|29 |
||
|[[File:Hotsauce.png]] |
|[[File:Hotsauce.png]] |
||
| − | + | |Hot sauce |
|
|{{yes}} |
|{{yes}} |
||
|{{no}} |
|{{no}} |
||
| Line 735: | Line 922: | ||
|30 |
|30 |
||
|[[File:Mycity - Dough.png]] |
|[[File:Mycity - Dough.png]] |
||
| + | |Dough |
||
| − | | style="text-align: left;" |Dough |
||
|{{no}} |
|{{no}} |
||
|{{no}} |
|{{no}} |
||
| Line 741: | Line 928: | ||
|31 |
|31 |
||
|[[File:Mycity - Wheat.png]] |
|[[File:Mycity - Wheat.png]] |
||
| + | |Wheat |
||
| − | | style="text-align: left;" |Wheat |
||
|{{yes}} |
|{{yes}} |
||
| rowspan="2" |{{yes}} |
| rowspan="2" |{{yes}} |
||
| Line 747: | Line 934: | ||
|32 |
|32 |
||
|[[File:Mycity - Wheat seed.png]] |
|[[File:Mycity - Wheat seed.png]] |
||
| − | + | |Wheat seed |
|
|{{yes}} |
|{{yes}} |
||
|- |
|- |
||
|33 |
|33 |
||
|[[File:Pizza.png]] |
|[[File:Pizza.png]] |
||
| + | |Pizza |
||
| − | | style="text-align: left;" |Pizza |
||
|{{yes}} |
|{{yes}} |
||
|{{no}} |
|{{no}} |
||
| Line 758: | Line 945: | ||
|34 |
|34 |
||
|[[File:Mycity - Corn Flakes.png]] |
|[[File:Mycity - Corn Flakes.png]] |
||
| − | + | |Corn Flakes |
|
|{{yes}} |
|{{yes}} |
||
|{{no}} |
|{{no}} |
||
| Line 764: | Line 951: | ||
|35 |
|35 |
||
|[[File:Mycity - Pumpkin (item).png]] |
|[[File:Mycity - Pumpkin (item).png]] |
||
| − | + | |Pumpkin |
|
|{{no}} |
|{{no}} |
||
| rowspan="2" |{{yes}} |
| rowspan="2" |{{yes}} |
||
| Line 770: | Line 957: | ||
|36 |
|36 |
||
|[[File:Mycity - Pumpkin seed.png]] |
|[[File:Mycity - Pumpkin seed.png]] |
||
| − | + | |Pumpkin seed |
|
|{{no}} |
|{{no}} |
||
|- |
|- |
||
|37 |
|37 |
||
|[[File:Mycity - Super Fertilizer.png]] |
|[[File:Mycity - Super Fertilizer.png]] |
||
| − | + | |Super Fertilizer |
|
|{{yes}} |
|{{yes}} |
||
|{{no}} |
|{{no}} |
||
| Line 781: | Line 968: | ||
|38 |
|38 |
||
|[[File:Cookies.png]] |
|[[File:Cookies.png]] |
||
| − | + | |Cookies |
|
|{{yes}} |
|{{yes}} |
||
|{{no}} |
|{{no}} |
||
| Line 787: | Line 974: | ||
|39 |
|39 |
||
|[[File:Mycity - Sugar.png]] |
|[[File:Mycity - Sugar.png]] |
||
| + | |Sugar |
||
| − | | style="text-align: left;" |Sugar |
||
|{{yes}} |
|{{yes}} |
||
|{{no}} |
|{{no}} |
||
| Line 793: | Line 980: | ||
|40 |
|40 |
||
|[[File:Mycity - Chocolate.png]] |
|[[File:Mycity - Chocolate.png]] |
||
| − | + | |Chocolate |
|
|{{yes}} |
|{{yes}} |
||
|{{no}} |
|{{no}} |
||
| Line 799: | Line 986: | ||
|41 |
|41 |
||
|[[File:Mycity - Blueberries.png]] |
|[[File:Mycity - Blueberries.png]] |
||
| − | + | |Blueberries |
|
|{{no}} |
|{{no}} |
||
| rowspan="2" |{{yes}} |
| rowspan="2" |{{yes}} |
||
| Line 805: | Line 992: | ||
|42 |
|42 |
||
|[[File:Mycity - Blueberry seed.png]] |
|[[File:Mycity - Blueberry seed.png]] |
||
| − | + | |Blueberry seed |
|
|{{no}} |
|{{no}} |
||
|- |
|- |
||
|43 |
|43 |
||
|[[File:Mycity - Cheese.png]] |
|[[File:Mycity - Cheese.png]] |
||
| + | |Cheese |
||
| − | | style="text-align: left;" |Cheese |
||
|{{yes}} |
|{{yes}} |
||
|{{no}} |
|{{no}} |
||
| Line 816: | Line 1,003: | ||
|44 |
|44 |
||
|[[File:Mycity - Smolt Fry.png]] |
|[[File:Mycity - Smolt Fry.png]] |
||
| − | + | |Smolt Fry |
|
|{{yes}} |
|{{yes}} |
||
|{{no}} |
|{{no}} |
||
| Line 822: | Line 1,009: | ||
|45 |
|45 |
||
|[[File:Mycity - Lion Fish.png]] |
|[[File:Mycity - Lion Fish.png]] |
||
| − | + | |Lion Fish |
|
|{{yes}} |
|{{yes}} |
||
|{{no}} |
|{{no}} |
||
| Line 828: | Line 1,015: | ||
|46 |
|46 |
||
|[[File:Mycity - Dog Fish.png]] |
|[[File:Mycity - Dog Fish.png]] |
||
| − | + | |Dog Fish |
|
|{{yes}} |
|{{yes}} |
||
|{{no}} |
|{{no}} |
||
| Line 834: | Line 1,021: | ||
|47 |
|47 |
||
|[[File:Mycity - Cat Fish.png]] |
|[[File:Mycity - Cat Fish.png]] |
||
| − | + | |Cat Fish |
|
|{{yes}} |
|{{yes}} |
||
|{{no}} |
|{{no}} |
||
| Line 840: | Line 1,027: | ||
|48 |
|48 |
||
|[[File:Mycity - Runty Guppy.png]] |
|[[File:Mycity - Runty Guppy.png]] |
||
| − | + | |Runty Guppy |
|
|{{yes}} |
|{{yes}} |
||
|{{no}} |
|{{no}} |
||
| Line 846: | Line 1,033: | ||
|49 |
|49 |
||
|[[File:Mycity - Lobster.png]] |
|[[File:Mycity - Lobster.png]] |
||
| − | + | |Lobster |
|
|{{yes}} |
|{{yes}} |
||
|{{no}} |
|{{no}} |
||
| Line 852: | Line 1,039: | ||
|50 |
|50 |
||
|[[File:Mycity - Goldenmare.png]] |
|[[File:Mycity - Goldenmare.png]] |
||
| − | + | |Goldenmare |
|
|{{yes}} |
|{{yes}} |
||
|{{no}} |
|{{no}} |
||
| Line 858: | Line 1,045: | ||
|51 |
|51 |
||
|[[File:Mycity - Frog.png]] |
|[[File:Mycity - Frog.png]] |
||
| + | |Frog |
||
| − | | style="text-align: left;" |Frog |
||
|{{yes}} |
|{{yes}} |
||
|{{no}} |
|{{no}} |
||
| Line 864: | Line 1,051: | ||
|52 |
|52 |
||
|[[File:Lemonade2.png]] |
|[[File:Lemonade2.png]] |
||
| − | + | |Lemonade |
|
|{{yes}} |
|{{yes}} |
||
|{{no}} |
|{{no}} |
||
| Line 870: | Line 1,057: | ||
|53 |
|53 |
||
|[[File:BisqueLobster.png]] |
|[[File:BisqueLobster.png]] |
||
| − | + | |Lobster Bisque |
|
|{{yes}} |
|{{yes}} |
||
|{{no}} |
|{{no}} |
||
| Line 876: | Line 1,063: | ||
|54 |
|54 |
||
|[[File:Bread-0.png]] |
|[[File:Bread-0.png]] |
||
| − | + | |Loaf of Bread |
|
|{{yes}} |
|{{yes}} |
||
|{{no}} |
|{{no}} |
||
| Line 882: | Line 1,069: | ||
|55 |
|55 |
||
|[[File:Bruschetta.png]] |
|[[File:Bruschetta.png]] |
||
| − | + | |Bruschetta |
|
|{{yes}} |
|{{yes}} |
||
|{{no}} |
|{{no}} |
||
| Line 888: | Line 1,075: | ||
|56 |
|56 |
||
|[[File:Waffles.png]] |
|[[File:Waffles.png]] |
||
| − | + | |Waffles |
|
|{{yes}} |
|{{yes}} |
||
|{{no}} |
|{{no}} |
||
| Line 894: | Line 1,081: | ||
|57 |
|57 |
||
| |
| |
||
| + | |Egg |
||
| − | | style="text-align: left;" |Egg |
||
|{{yes}} |
|{{yes}} |
||
|{{no}} |
|{{no}} |
||
|- |
|- |
||
|58 |
|58 |
||
| − | |[[File:Honey.png]] |
+ | |[[File:Honey Mycity.png]] |
| + | |Honey |
||
| − | | style="text-align: left;" |Honey |
||
|{{yes}} |
|{{yes}} |
||
|{{no}} |
|{{no}} |
||
| Line 906: | Line 1,093: | ||
|59 |
|59 |
||
|[[File:GrilledLobster.png]] |
|[[File:GrilledLobster.png]] |
||
| − | + | |Grilled Lobster |
|
|{{yes}} |
|{{yes}} |
||
|{{no}} |
|{{no}} |
||
| Line 912: | Line 1,099: | ||
|60 |
|60 |
||
|[[File:FrogSandwich2.png]] |
|[[File:FrogSandwich2.png]] |
||
| − | + | |Frogwich |
|
|{{yes}} |
|{{yes}} |
||
|{{no}} |
|{{no}} |
||
| Line 918: | Line 1,105: | ||
|61 |
|61 |
||
|[[File:Cake.png]] |
|[[File:Cake.png]] |
||
| − | + | |Chocolate Cake |
|
|{{yes}} |
|{{yes}} |
||
|{{no}} |
|{{no}} |
||
| Line 924: | Line 1,111: | ||
|62 |
|62 |
||
|[[File:WheatFlour2.png]] |
|[[File:WheatFlour2.png]] |
||
| − | + | |Wheat Flour |
|
|{{yes}} |
|{{yes}} |
||
|{{no}} |
|{{no}} |
||
| Line 930: | Line 1,117: | ||
|63 |
|63 |
||
|[[File:Salad.png]] |
|[[File:Salad.png]] |
||
| + | |Salad |
||
| − | | style="text-align: left;" |Salad |
||
|{{yes}} |
|{{yes}} |
||
|{{no}} |
|{{no}} |
||
| Line 936: | Line 1,123: | ||
|64 |
|64 |
||
|[[File:Lettuce3.png]] |
|[[File:Lettuce3.png]] |
||
| − | + | |Lettuce |
|
|{{yes}} |
|{{yes}} |
||
|{{no}} |
|{{no}} |
||
| Line 942: | Line 1,129: | ||
|65 |
|65 |
||
|[[File:Pierogies.png]] |
|[[File:Pierogies.png]] |
||
| − | + | |Pierogies |
|
|{{yes}} |
|{{yes}} |
||
|{{no}} |
|{{no}} |
||
| Line 948: | Line 1,135: | ||
|66 |
|66 |
||
|[[File:Potato-0.png]] |
|[[File:Potato-0.png]] |
||
| + | |Potato |
||
| − | | style="text-align: left;" |Potato |
||
|{{yes}} |
|{{yes}} |
||
|{{no}} |
|{{no}} |
||
| Line 954: | Line 1,141: | ||
|67 |
|67 |
||
|[[File:Frenchfries.png]] |
|[[File:Frenchfries.png]] |
||
| + | |Fries |
||
| − | | style="text-align: left;" |Fries |
||
|{{yes}} |
|{{yes}} |
||
|{{no}} |
|{{no}} |
||
| Line 960: | Line 1,147: | ||
|68 |
|68 |
||
|[[File:Pudding.png]] |
|[[File:Pudding.png]] |
||
| − | + | |Pudding |
|
|{{yes}} |
|{{yes}} |
||
|{{no}} |
|{{no}} |
||
| Line 966: | Line 1,153: | ||
|69 |
|69 |
||
|[[File:GarlicBread.png]] |
|[[File:GarlicBread.png]] |
||
| − | + | |Garlic Bread |
|
|{{yes}} |
|{{yes}} |
||
|{{no}} |
|{{no}} |
||
| Line 972: | Line 1,159: | ||
|70 |
|70 |
||
|[[File:Garlic3.png]] |
|[[File:Garlic3.png]] |
||
| + | |Garlic |
||
| − | | style="text-align: left;" |Garlic |
||
|{{yes}} |
|{{yes}} |
||
|{{no}} |
|{{no}} |
||
| Line 978: | Line 1,165: | ||
|71 |
|71 |
||
|[[File:Blueprint.png]] |
|[[File:Blueprint.png]] |
||
| − | + | |Blueprint |
|
|{{no}} |
|{{no}} |
||
|{{no}} |
|{{no}} |
||
| Line 984: | Line 1,171: | ||
|72 |
|72 |
||
|[[File:Crystal yellow.png]] |
|[[File:Crystal yellow.png]] |
||
| − | + | |Yellow Crystal |
|
|{{yes}} |
|{{yes}} |
||
|{{no}} |
|{{no}} |
||
| Line 990: | Line 1,177: | ||
|73 |
|73 |
||
|[[File:Crystal blue.png]] |
|[[File:Crystal blue.png]] |
||
| − | + | |Blue Crystal |
|
|{{yes}} |
|{{yes}} |
||
|{{no}} |
|{{no}} |
||
| Line 996: | Line 1,183: | ||
|74 |
|74 |
||
|[[File:Crystal purple.png]] |
|[[File:Crystal purple.png]] |
||
| − | + | |Purple Crystal |
|
|{{yes}} |
|{{yes}} |
||
|{{no}} |
|{{no}} |
||
| Line 1,002: | Line 1,189: | ||
|75 |
|75 |
||
|[[File:Crystal green.png]] |
|[[File:Crystal green.png]] |
||
| − | + | |Green Crystal |
|
|{{yes}} |
|{{yes}} |
||
|{{no}} |
|{{no}} |
||
| Line 1,008: | Line 1,195: | ||
|76 |
|76 |
||
|[[File:Crystal red.png]] |
|[[File:Crystal red.png]] |
||
| − | + | |Red Crystal |
|
|{{yes}} |
|{{yes}} |
||
|{{no}} |
|{{no}} |
||
| Line 1,014: | Line 1,201: | ||
|77 |
|77 |
||
|[[File:Banana.png]] |
|[[File:Banana.png]] |
||
| + | |Banana |
||
| − | | style="text-align: left;" |Banana |
||
|{{yes}} |
|{{yes}} |
||
| rowspan="2" |{{yes}} |
| rowspan="2" |{{yes}} |
||
| Line 1,020: | Line 1,207: | ||
|78 |
|78 |
||
|[[File:BananaSeedling.png]] |
|[[File:BananaSeedling.png]] |
||
| − | + | |Banana Seedling |
|
|{{yes}} |
|{{yes}} |
||
|- |
|- |
||
|79 |
|79 |
||
|[[File:Fish Stew.png]] |
|[[File:Fish Stew.png]] |
||
| − | + | |Fish Stew |
|
|{{yes}} |
|{{yes}} |
||
|{{no}} |
|{{no}} |
||
| Line 1,031: | Line 1,218: | ||
|80 |
|80 |
||
|[[File:GrilledCheese.png]] |
|[[File:GrilledCheese.png]] |
||
| − | + | |Grilled Cheese |
|
|{{yes}} |
|{{yes}} |
||
|{{no}} |
|{{no}} |
||
| Line 1,037: | Line 1,224: | ||
|81 |
|81 |
||
|[[File:FishBurger.png]] |
|[[File:FishBurger.png]] |
||
| − | + | |Fish Burger |
|
|{{yes}} |
|{{yes}} |
||
|{{no}} |
|{{no}} |
||
| Line 1,043: | Line 1,230: | ||
|82 |
|82 |
||
|[[File:Sashimi.png]] |
|[[File:Sashimi.png]] |
||
| − | + | |Sashimi |
|
|{{yes}} |
|{{yes}} |
||
|{{no}} |
|{{no}} |
||
| Line 1,049: | Line 1,236: | ||
|83 |
|83 |
||
|[[File:Banana Cake.png]] |
|[[File:Banana Cake.png]] |
||
| − | + | |Banana Cake |
|
|{{yes}} |
|{{yes}} |
||
|{{no}} |
|{{no}} |
||
| Line 1,055: | Line 1,242: | ||
|84 |
|84 |
||
|[[File:Croquettes.png]] |
|[[File:Croquettes.png]] |
||
| − | + | |Potato Croquettes |
|
|{{yes}} |
|{{yes}} |
||
|{{no}} |
|{{no}} |
||
| − | |} |
||
| − | ==Unreleased items== |
||
| − | These items are not available because they are not released yet. |
||
| − | |||
| − | {| class="wikitable sortable centertext" |
||
| − | ! style="width: 50px;" |ID |
||
| − | ! style="width: 50px;" class="unsortable" |Image |
||
| − | ! style="width: 200px;" |Name |
||
|- |
|- |
||
|85 |
|85 |
||
| + | |[[File:Meat tfm mycity.png|thumb]] |
||
| − | | |
||
| + | |Meat |
||
| − | | style="text-align: left;" |Meat |
||
| + | |{{yes}} |
||
| + | |{{no}} |
||
|- |
|- |
||
|86 |
|86 |
||
| |
| |
||
| − | + | |Mushroom |
|
| + | |{{yes}} |
||
| + | |{{no}} |
||
|- |
|- |
||
|87 |
|87 |
||
| |
| |
||
| − | + | |Cheeseburger |
|
| + | |{{yes}} |
||
| + | |{{no}} |
||
|- |
|- |
||
|88 |
|88 |
||
| |
| |
||
| − | + | |Lasagna |
|
| + | |{{yes}} |
||
| + | |{{no}} |
||
|- |
|- |
||
|89 |
|89 |
||
| |
| |
||
| − | + | |Meatballs |
|
| + | |{{yes}} |
||
| + | |{{no}} |
||
|- |
|- |
||
|90 |
|90 |
||
| |
| |
||
| − | + | |Garlic Mashed Potatoes |
|
| + | |{{yes}} |
||
| + | |{{no}} |
||
|- |
|- |
||
|91 |
|91 |
||
| |
| |
||
| − | + | |Mushroom Burger |
|
| + | |{{yes}} |
||
| + | |{{no}} |
||
|- |
|- |
||
|92 |
|92 |
||
| |
| |
||
| − | + | |Cream of Mushroom |
|
| + | |{{yes}} |
||
| + | |{{no}} |
||
|} |
|} |
||
| Line 1,103: | Line 1,298: | ||
==Shops== |
==Shops== |
||
===Mine shop=== |
===Mine shop=== |
||
| + | Go through the labyrinth in the mine into the big empty area and keep running to the right.Use boat to get across and there will be John, who sells ''dynamite,clock,chest.'' |
||
| − | <infobox> |
||
| + | |||
| + | <br /><infobox> |
||
<title><default>Mine shop (mine area 3)</default></title> |
<title><default>Mine shop (mine area 3)</default></title> |
||
<group layout="horizontal" row-items="1"> |
<group layout="horizontal" row-items="1"> |
||
| Line 1,132: | Line 1,329: | ||
|Used for bank robbery (see {{Section link||Bank robbery}}). |
|Used for bank robbery (see {{Section link||Bank robbery}}). |
||
|- |
|- |
||
| − | | style="text-align:center;" |[[File:Chest2.png |
+ | | style="text-align:center;" |[[File:Chest2.png|50x50px]] |
|Chest (golden) |
|Chest (golden) |
||
|QP$300 |
|QP$300 |
||
| Line 1,142: | Line 1,339: | ||
===Market=== |
===Market=== |
||
| − | {{sectionstub}} |
||
<infobox> |
<infobox> |
||
<title><default>Market</default></title> |
<title><default>Market</default></title> |
||
| Line 1,200: | Line 1,396: | ||
| -15 |
| -15 |
||
|- |
|- |
||
| − | |[[File: |
+ | |[[File:Sug-removebg-preview.png]] |
| style="text-align: left;" |Sugar |
| style="text-align: left;" |Sugar |
||
|$3 |
|$3 |
||
| Line 1,206: | Line 1,402: | ||
|0.11 |
|0.11 |
||
|- |
|- |
||
| + | |[[File:Grn.png]] |
||
| − | |TBA |
||
| + | |Energymax (green) |
||
| − | | style="text-align: left;" | |
||
| + | |$25 |
||
| − | Backpack Upgrade |
||
| + | |10 |
||
| − | *+5 slots each |
||
| + | |0 |
||
| − | *45 slots - max |
||
| + | |- |
||
| − | |$3000 |
||
| + | |[[File:Ylw.png]] |
||
| − | |{{bc}} |
||
| + | |Energymax (yellow) |
||
| − | |{{bc}} |
||
| + | |$30 |
||
| + | |15 |
||
| + | |0 |
||
| + | |- |
||
| + | |[[File:Blu.png]] |
||
| + | |Energymax (blue) |
||
| + | |$60 |
||
| + | |30 |
||
| + | |0 |
||
|} |
|} |
||
{{clear}} |
{{clear}} |
||
| − | === |
+ | ===Vehicles=== |
<infobox> |
<infobox> |
||
| − | <title><default>Car |
+ | <title><default>Car Dealership</default></title> |
<group layout="horizontal" row-items="1"> |
<group layout="horizontal" row-items="1"> |
||
<data><default>'''Exterior'''<br />[[File:Mycity - car dealership - exterior.png|100px]]</default></data> |
<data><default>'''Exterior'''<br />[[File:Mycity - car dealership - exterior.png|100px]]</default></data> |
||
| Line 1,226: | Line 1,431: | ||
</group> |
</group> |
||
</infobox> |
</infobox> |
||
| − | |||
| − | {| class="wikitable centertext" |
||
| − | !Image |
||
| − | !Name |
||
| − | !Km/h |
||
| − | !Price |
||
| − | |- |
||
| − | |[[File:Mycity - Classic XI.png]] |
||
| − | | style="text-align: left;" |Classic XI |
||
| − | |70 |
||
| − | |2,000 |
||
| − | |- |
||
| − | |[[File:Mycity - Mini Cooper.png]] |
||
| − | | style="text-align: left;" |Mini Cooper |
||
| − | |90 |
||
| − | |6,000 |
||
| − | |- |
||
| − | |[[File:Mycity - BMW.png]] |
||
| − | | style="text-align: left;" |BMW |
||
| − | |120 |
||
| − | |10,000 |
||
| − | |- |
||
| − | |[[File:Mycity - Ferrari 488.png]] |
||
| − | | style="text-align: left;" |Ferrari 488 |
||
| − | |150 |
||
| − | |15,000 |
||
| − | |- |
||
| − | |[[File:Mycity - Lamborghini.png]] |
||
| − | | style="text-align: left;" |Lamborghini |
||
| − | |210 |
||
| − | |45,000 |
||
| − | |} |
||
| − | |||
| − | {{clear}} |
||
| − | ===Boat Shop (dealerSHIP)=== |
||
<infobox> |
<infobox> |
||
<title><default>Boat Shop</default></title> |
<title><default>Boat Shop</default></title> |
||
| Line 1,268: | Line 1,438: | ||
</infobox> |
</infobox> |
||
| + | At the right side of the bag is available a vehicles button ([[File:Mycity - vehicles.png]]). Using this menu, players can spawn vehicles, including the boat obtained through the {{Section link||Quest 01: Building a boat}}. The boat shop is in the mine and you need to click to the ladder to exit from there |
||
| − | {| class="wikitable centertext" |
||
| + | |||
| + | Secret boat shop: Need to have the Lucky flower and the Goldenmare in the inventory, as well as $500,000. Then click on Blank the NPC ,then walk right into the secret shop,and the Bugatti and Yacht will appear. |
||
| + | |||
| + | {| class="wikitable centertext" style="text-align:center" |
||
| + | ! |
||
!Image |
!Image |
||
!Name |
!Name |
||
!Speed |
!Speed |
||
!Price |
!Price |
||
| + | !Where is sold |
||
|- |
|- |
||
| + | !'''<big>Land</big>''' |
||
| − | |TBA |
||
| + | ! |
||
| − | | style="text-align: left;" |Fishing Boat |
||
| + | ! |
||
| + | ! |
||
| + | ! |
||
| + | ! |
||
| + | |- |
||
| + | | |
||
| + | |[[File:Car classic.png]] |
||
| + | |Classic XI |
||
| + | |70 km/h |
||
| + | |$2,000 |
||
| + | |Car Dealership |
||
| + | |- |
||
| + | | |
||
| + | |[[File:Car MiniCooper.png]] |
||
| + | |Mini Cooper |
||
| + | |90 km/h |
||
| + | |$6,000 |
||
| + | |Car Dealership |
||
| + | |- |
||
| + | | |
||
| + | |[[File:Car bmw.png]] |
||
| + | |BMW |
||
| + | |120 km/h |
||
| + | |$10,000 |
||
| + | |Car Dealership |
||
| + | |- |
||
| + | | |
||
| + | |[[File:Car Ferrari.png]] |
||
| + | |Ferrari 488 |
||
| + | |150 km/h |
||
| + | |$15,000 |
||
| + | |Car Dealership |
||
| + | |- |
||
| + | | |
||
| + | |[[File:Car Lamborghini.png]] |
||
| + | |Lamborghini |
||
| + | |210 km/h |
||
| + | |$45,000 |
||
| + | |Car Dealership |
||
| + | |- |
||
| + | | |
||
| + | |[[File:Car Green Lamborghini.png]] |
||
| + | |Green Lamborghini |
||
| + | |210 km/h |
||
| + | |{{bc}} |
||
| + | |{{bc}} |
||
| + | |- |
||
| + | | |
||
| + | |[[File:Car Bugatti.png]] |
||
| + | |Bugatti |
||
| + | |400 km/h |
||
| + | |$500,000 |
||
| + | |Secret Boat Shop |
||
| + | |- |
||
| + | | |
||
| + | |[[File:Car Purple Bugatti.png]] |
||
| + | |Blue Bugatti |
||
| + | |450 km/h |
||
| + | |{{bc}} |
||
| + | |{{bc}} |
||
| + | |- |
||
| + | | |
||
| + | |[[File:Purple.png|113x113px]] |
||
| + | |Purple Bugatti |
||
| + | |450 km/h |
||
| + | | |
||
| + | | |
||
| + | |- |
||
| + | | |
||
| + | |[[File:Car Koenigsegg Agera.png]] |
||
| + | |Koenigsegg Agera |
||
| + | |450 km/h |
||
| + | |{{bc}} |
||
| + | |{{bc}} |
||
| + | |- |
||
| + | | |
||
| + | |[[File:Win.png|105x105px]] |
||
| + | |Huracan Evo |
||
| + | | |
||
| + | | |
||
| + | |Season 7 win |
||
| + | |- |
||
| + | !'''<big>Air</big>''' |
||
| + | ! |
||
| + | ! |
||
| + | ! |
||
| + | ! |
||
| + | ! |
||
| + | |- |
||
| + | | |
||
| + | |[[File:Car Sleigh.png]] |
||
| + | |Sleigh |
||
| + | |90 km/h |
||
| + | |$20,000 |
||
| + | |{{bc}} |
||
| + | |- |
||
| + | | |
||
| + | |[[File:Rbm.png|96x96px]] |
||
| + | |Broom |
||
| + | |120 km/h |
||
| + | |$400,000 |
||
| + | | |
||
| + | |- |
||
| + | | |
||
| + | |[[File:Hmm.png|86x86px]] |
||
| + | |Airship |
||
| + | |110 km/h |
||
| + | | |
||
| + | | |
||
| + | |- |
||
| + | !'''<big>Water</big>''' |
||
| + | ! |
||
| + | ! |
||
| + | ! |
||
| + | ! |
||
| + | ! |
||
| + | |- |
||
| + | | |
||
| + | |[[File:Boat.png]] |
||
| + | |Boat |
||
| + | |50 knots |
||
| + | |{{bc}} |
||
| + | |{{bc}} |
||
| + | |- |
||
| + | | |
||
| + | |{{bc}}? |
||
| + | |Fishing Boat |
||
|54 knots |
|54 knots |
||
|$30,000 |
|$30,000 |
||
| + | |Boat Shop |
||
|- |
|- |
||
| + | | |
||
| − | |[[File:Mycity - Motorboat.png|125px|center]] |
||
| + | |[[File:Boat Patrol.png]] |
||
| − | | style="text-align: left;" |Patrol Boat |
||
| + | |Patrol Boat |
||
|70 knots |
|70 knots |
||
|$40,000 |
|$40,000 |
||
| + | |Boat Shop |
||
|- |
|- |
||
| + | | |
||
| − | |[[File:Mycity - Tugship.png|125px|center]] |
||
| + | |[[File:Boat Tugship.png]] |
||
| − | | style="text-align: left;" |Tug Ship |
||
| + | |Tug Ship |
||
|100 knots |
|100 knots |
||
| + | |{{bc}} |
||
| − | |$30,000 |
||
| + | |{{bc}} |
||
|- |
|- |
||
| + | | |
||
| − | |[[File:Mycity - Yacht.png|125px|center]] |
||
| + | |[[File:Boat Yacht.png]] |
||
| − | | style="text-align: left;" |Yacht |
||
| + | |Yacht |
||
|200 knots |
|200 knots |
||
|$500,000 |
|$500,000 |
||
| + | |Secret Boat Shop |
||
|- |
|- |
||
| + | | |
||
| − | |[[File:Mycity - Bugatti.png|125px|center]] |
||
| + | |[[File:Premiumyacht.png|116x116px]] |
||
| − | | style="text-align: left;" |Bugatti |
||
| + | |Premium Yacht |
||
| − | |400 km/h |
||
| + | |200 knots |
||
| − | |$500,000 |
||
| + | | |
||
| + | |Season 5 win |
||
|} |
|} |
||
| − | |||
| − | {{clear}} |
||
===Potion shop=== |
===Potion shop=== |
||
| Line 1,327: | Line 1,637: | ||
| style="text-align: center;" |40 |
| style="text-align: center;" |40 |
||
|Use this potion to growth for 30 seconds! |
|Use this potion to growth for 30 seconds! |
||
| + | |- |
||
| + | |[[File:Pot.png|alt=|center|70x70px]]<br /> |
||
| + | | |
||
| + | Speed Potion |
||
| + | |||
| + | |50 |
||
| + | |Use this potion to walk faster for 30 seconds! |
||
|} |
|} |
||
| Line 1,347: | Line 1,664: | ||
!Food |
!Food |
||
|- |
|- |
||
| − | |[[File: |
+ | |[[File:Mycity_-_Coffee.png]] |
| style="text-align: left;" |Coffee |
| style="text-align: left;" |Coffee |
||
| − | |$ |
+ | |$50 |
|25 |
|25 |
||
|1 |
|1 |
||
|- |
|- |
||
| − | |[[File: |
+ | |[[File:Ckky2.png|65x65px]] |
| + | | style="text-align: left;" |Cookies |
||
| + | |$100 |
||
| + | |20 |
||
| + | |16 |
||
| + | |- |
||
| + | |[[File:Wfl.png|67x67px]] |
||
| + | | style="text-align: left;" |Waffles |
||
| + | |$150 |
||
| + | |28 |
||
| + | |50 |
||
| + | |- |
||
| + | |[[File:HotChocolate.png]] |
||
| style="text-align: left;" |Hot Chocolate |
| style="text-align: left;" |Hot Chocolate |
||
|$168 |
|$168 |
||
| Line 1,359: | Line 1,688: | ||
|9 |
|9 |
||
|- |
|- |
||
| − | |[[File: |
+ | |[[File:Milkshake.png]] |
| style="text-align: left;" |Milkshake |
| style="text-align: left;" |Milkshake |
||
|$260 |
|$260 |
||
|20 |
|20 |
||
|17 |
|17 |
||
| + | |- |
||
| + | |[[File:Pum-removebg-preview.png]] |
||
| + | |Pumpkin Pie |
||
| + | |$10 diamond |
||
| + | |102 |
||
| + | |132 |
||
| + | |} |
||
| + | |||
| + | {{clear}} |
||
| + | |||
| + | ===Pizzeria=== |
||
| + | {| class="wikitable centertext" |
||
| + | !Image |
||
| + | !Name |
||
| + | !Price |
||
| + | !Energy |
||
| + | !Food |
||
| + | |- |
||
| + | |TBA |
||
| + | |Energymax |
||
| + | |$25 |
||
| + | |10 |
||
| + | |0 |
||
| + | |- |
||
| + | |TBA |
||
| + | |Energymax |
||
| + | |$60 |
||
| + | |30 |
||
| + | |0 |
||
| + | |- |
||
| + | |TBA |
||
| + | |Energymax |
||
| + | |$30 |
||
| + | |15 |
||
| + | |0 |
||
| + | |- |
||
| + | |[[File:Milkshake1.png|81x81px]] |
||
| + | |Milkshake |
||
| + | |$260 |
||
| + | |20 |
||
| + | |17 |
||
| + | |- |
||
| + | |[[File:T Sauce.png]] |
||
| + | |Tomato Sauce |
||
| + | |$30 |
||
| + | |9 |
||
| + | |6 |
||
| + | |- |
||
| + | |[[File:Pizza1.png]] |
||
| + | |Pizza |
||
| + | |$286 |
||
| + | |59 |
||
| + | |60 |
||
| + | |- |
||
| + | |[[File:H sauce.png]] |
||
| + | |Hot Sauce |
||
| + | |$30 |
||
| + | |19 |
||
| + | |9 |
||
|} |
|} |
||
| Line 1,384: | Line 1,772: | ||
!In-game description |
!In-game description |
||
|- |
|- |
||
| − | |[[File: |
+ | |[[File:Mycity_-_Seed.png]] |
|Seed |
|Seed |
||
| style="text-align: center;" |$50 |
| style="text-align: center;" |$50 |
||
|A random seed. |
|A random seed. |
||
|- |
|- |
||
| − | |[[File: |
+ | |[[File:Mycity_-_Fertilizer.png]] |
|Fertilizer |
|Fertilizer |
||
| style="text-align: center;" |$200 |
| style="text-align: center;" |$200 |
||
|Make seeds grow faster! |
|Make seeds grow faster! |
||
|- |
|- |
||
| − | |[[File: |
+ | |[[File:Mycity_-_Water_bucket.png]] |
|Water bucket |
|Water bucket |
||
| style="text-align: center;" |$80 |
| style="text-align: center;" |$80 |
||
|Make seeds grow faster! |
|Make seeds grow faster! |
||
| + | |- |
||
| + | |[[File:Sh3.png|46x46px]] |
||
| + | |Shovel |
||
| + | | style="text-align: center;" |$500 |
||
| + | |To remove unwanted plants. |
||
| + | |- |
||
| + | |[[File:Trunk.png]] |
||
| + | |Trunk |
||
| + | |QP$5 |
||
| + | | |
||
| + | |- |
||
| + | |[[File:Trunk2.png|58x58px]] |
||
| + | |Trunk |
||
| + | |QP$5 |
||
| + | | |
||
| + | |- |
||
| + | |[[File:Frence.png|54x54px]] |
||
| + | |Live Fence |
||
| + | |QP$5 |
||
| + | | |
||
|} |
|} |
||
| − | |||
{{clear}} |
{{clear}} |
||
| − | ===QP shop=== |
+ | ===QP (diamond) shop=== |
<infobox> |
<infobox> |
||
<title><default>QP shop (Oliver's house)</default></title> |
<title><default>QP shop (Oliver's house)</default></title> |
||
| Line 1,419: | Line 1,826: | ||
!Created by |
!Created by |
||
|- |
|- |
||
| − | |[[File:Mycity - Hay.png]] |
+ | |[[File:Mycity - Hay.png|81x81px]] |
| style="text-align: left;" |Hay |
| style="text-align: left;" |Hay |
||
|1 |
|1 |
||
| Line 1,440: | Line 1,847: | ||
|{{bc}} |
|{{bc}} |
||
|- |
|- |
||
| + | |[[File:Wgn.png|82x82px]] |
||
| − | |TBA |
||
| style="text-align: left;" |Hay Wagon |
| style="text-align: left;" |Hay Wagon |
||
| |
| |
||
| Line 1,447: | Line 1,854: | ||
|{{bc}} |
|{{bc}} |
||
|- |
|- |
||
| + | |[[File:Scr.png|67x67px]] |
||
| − | |TBA |
||
| style="text-align: left;" |Scarecrow |
| style="text-align: left;" |Scarecrow |
||
| |
| |
||
| Line 1,454: | Line 1,861: | ||
|{{bc}} |
|{{bc}} |
||
|- |
|- |
||
| + | |[[File:Fence1.png|68x68px]] |
||
| − | |TBA |
||
| style="text-align: left;" |Fence |
| style="text-align: left;" |Fence |
||
| |
| |
||
| Line 1,461: | Line 1,868: | ||
|{{bc}} |
|{{bc}} |
||
|- |
|- |
||
| + | |[[File:Wht.png|73x73px]] |
||
| − | |TBA |
||
| style="text-align: left;" |Fence (white) |
| style="text-align: left;" |Fence (white) |
||
| |
| |
||
| Line 1,468: | Line 1,875: | ||
|{{bc}} |
|{{bc}} |
||
|- |
|- |
||
| + | |[[File:Bsh2.png|71x71px]] |
||
| − | |TBA |
||
| style="text-align: left;" |Bush |
| style="text-align: left;" |Bush |
||
| |
| |
||
| Line 1,475: | Line 1,882: | ||
|{{bc}} |
|{{bc}} |
||
|- |
|- |
||
| + | |[[File:Brm.png|70x70px]] |
||
| − | |TBA |
||
| style="text-align: left;" |Broom |
| style="text-align: left;" |Broom |
||
| |
| |
||
| Line 1,492: | Line 1,899: | ||
| style="text-align: left;" |Chest |
| style="text-align: left;" |Chest |
||
|5 |
|5 |
||
| − | | |
+ | |50 |
| style="text-align: left;" |Stores items. |
| style="text-align: left;" |Stores items. |
||
|{{bc}} |
|{{bc}} |
||
|} |
|} |
||
| + | {{clear}} |
||
| + | |||
| + | ===Restaurant QP (diamond)=== |
||
| + | * |
||
| + | {| class="fandom-table" |
||
| + | |+ |
||
| + | '''Lucas''' |
||
| + | !Image |
||
| + | !Name |
||
| + | !Price |
||
| + | !In-game description |
||
| + | |- |
||
| + | |[[File:Image-removebg-preview(6).png|62x62px]] |
||
| + | |Shelf |
||
| + | |$5 |
||
| + | | |
||
| + | |- |
||
| + | |[[File:Idk.png|63x63px]] |
||
| + | |Shelf |
||
| + | |$5 |
||
| + | | |
||
| + | |- |
||
| + | |[[File:Kjl.png|51x51px]] |
||
| + | |Kitchen Cabinet |
||
| + | |$7 |
||
| + | | |
||
| + | |- |
||
| + | |[[File:Hug.png|50x50px]] |
||
| + | |Kitchen Cabinet |
||
| + | |$7 |
||
| + | | |
||
| + | |- |
||
| + | |[[File:Lol-removebg-preview (2).png|59x59px]] |
||
| + | |Dining Table |
||
| + | |$20 |
||
| + | | |
||
| + | |- |
||
| + | |[[File:Grl.png|50x50px]] |
||
| + | |Barbecue Grill |
||
| + | |$20 |
||
| + | | |
||
| + | |- |
||
| + | |[[File:Ovn.png|38x38px]] |
||
| + | |Oven |
||
| + | |$30 |
||
| + | | |
||
| + | |- |
||
| + | |[[File:Fri.png|80x80px]] |
||
| + | |Fridge |
||
| + | |Free |
||
| + | |need finished quest 5 |
||
| + | |} |
||
| + | * |
||
{{clear}} |
{{clear}} |
||
| Line 1,654: | Line 2,114: | ||
|} |
|} |
||
| − | '''Iho''' |
+ | '''Iho (diamond)''' |
{| class="wikitable centertext" |
{| class="wikitable centertext" |
||
!Image |
!Image |
||
| Line 1,662: | Line 2,122: | ||
!Created by |
!Created by |
||
|- |
|- |
||
| + | |[[File:Duck.png|45x45px]] |
||
| − | |TBA |
||
|Inflatable Duck |
|Inflatable Duck |
||
|QP$10 |
|QP$10 |
||
| Line 1,668: | Line 2,128: | ||
|{{Nickname|Iho#5679|id=57948884}} |
|{{Nickname|Iho#5679|id=57948884}} |
||
|- |
|- |
||
| + | |[[File:Chair.png|60x60px]] |
||
| − | |TBA |
||
|Lifesaver Chair |
|Lifesaver Chair |
||
|QP$5 |
|QP$5 |
||
| Line 1,674: | Line 2,134: | ||
|{{Nickname|Iho#5679|id=57948884}} |
|{{Nickname|Iho#5679|id=57948884}} |
||
|- |
|- |
||
| + | |[[File:Cool Box.png]] |
||
| − | |TBA |
||
|Cool Box |
|Cool Box |
||
|QP$5 |
|QP$5 |
||
| Line 1,680: | Line 2,140: | ||
|{{Nickname|Iho#5679|id=57948884}} |
|{{Nickname|Iho#5679|id=57948884}} |
||
|- |
|- |
||
| + | |[[File:Shower.png|60x60px]] |
||
| − | |TBA |
||
|Shower |
|Shower |
||
|QP$5 |
|QP$5 |
||
| Line 1,686: | Line 2,146: | ||
|{{Nickname|Iho#5679|id=57948884}} |
|{{Nickname|Iho#5679|id=57948884}} |
||
|- |
|- |
||
| + | |[[File:Flamingo.png|53x53px]] |
||
| − | |TBA |
||
|Flamingo |
|Flamingo |
||
|QP$10 |
|QP$10 |
||
| Line 1,697: | Line 2,157: | ||
===Dave's Tent=== |
===Dave's Tent=== |
||
| − | You can trade items with Dave, |
+ | You can trade items with Dave, list of items changs everyday. Also some items can be obtained only from Dave (like eggs, garlic, etc.). |
'''Known deals (WIP)''' |
'''Known deals (WIP)''' |
||
| Line 1,706: | Line 2,166: | ||
!= |
!= |
||
!Image |
!Image |
||
| − | !Item |
+ | !Item received |
!Quantity |
!Quantity |
||
|- |
|- |
||
| Line 1,713: | Line 2,173: | ||
|5 |
|5 |
||
!= |
!= |
||
| + | |[[File:BananaSeedling.png]] |
||
| − | |TBA |
||
|Banana Seedling |
|Banana Seedling |
||
|1 |
|1 |
||
| Line 1,721: | Line 2,181: | ||
|3 |
|3 |
||
!= |
!= |
||
| + | |[[File:Banana.png]] |
||
| − | |TBA |
||
|Banana |
|Banana |
||
|5 |
|5 |
||
| Line 1,753: | Line 2,213: | ||
|3 |
|3 |
||
!= |
!= |
||
| + | |[[File:Banana.png]] |
||
| − | |TBA |
||
|Banana |
|Banana |
||
|5 |
|5 |
||
| Line 1,785: | Line 2,245: | ||
|5 |
|5 |
||
!= |
!= |
||
| − | |[[File:Honey.png]] |
+ | |[[File:Honey Mycity.png]] |
|Honey |
|Honey |
||
|2 |
|2 |
||
| Line 1,793: | Line 2,253: | ||
|3 |
|3 |
||
!= |
!= |
||
| − | |[[File:Honey.png]] |
+ | |[[File:Honey Mycity.png]] |
|Honey |
|Honey |
||
|2 |
|2 |
||
| + | |- |
||
| + | |[[File:Mycity - Tomato.png]] |
||
| + | |Tomato |
||
| + | |10 |
||
| + | != |
||
| + | |[[File:Lettuce3.png]] |
||
| + | |Lettuce |
||
| + | |5 |
||
| + | |- |
||
| + | |[[File:Cake.png]] |
||
| + | |Chocolate Cake |
||
| + | |2 |
||
| + | != |
||
| + | |[[File:Mycity - Pumpkin (item).png]] |
||
| + | |Pumpkin |
||
| + | |1 |
||
| + | |- |
||
| + | |[[File:GrilledLobster.png]] |
||
| + | |Grilled Lobster |
||
| + | |3 |
||
| + | != |
||
| + | |[[File:BananaSeedling.png]] |
||
| + | |Banana Seedling |
||
| + | |1 |
||
| + | |- |
||
| + | |[[File:Mycity - Smolt Fry.png]] |
||
| + | |Smolt Fry |
||
| + | |3 |
||
| + | != |
||
| + | | |
||
| + | |Meat |
||
| + | |1 |
||
| + | |- |
||
| + | |[[File:Banana.png]] |
||
| + | |Banana |
||
| + | |3 |
||
| + | != |
||
| + | |[[File:Garlic3.png]] |
||
| + | |Garlic |
||
| + | |3 |
||
| + | |- |
||
| + | |[[File:Mycity - Cheese.png]] |
||
| + | |Cheese |
||
| + | |3 |
||
| + | != |
||
| + | | |
||
| + | |Meat |
||
| + | |1 |
||
|} |
|} |
||
==Quests== |
==Quests== |
||
| − | + | The quests can be accessed by clicking the book ([[File:Mycity - quests.png]]) at the top-right corner. |
|
===Quest 01: Building a boat=== |
===Quest 01: Building a boat=== |
||
| − | '''Reward''': EXP +3000, QP$ +20 |
+ | '''Reward''': EXP +3000, QP$ +20, Boat becomes available |
| − | {| class="wikitable" |
+ | {| class="wikitable sortable centertext" |
| + | ! style="width: 50px;" |№ |
||
| − | !№ |
||
| − | !Description |
+ | ! style="width: 175px;" |Description |
| + | ! style="width: 275px;" |Tips |
||
| − | !Tips |
||
|- |
|- |
||
| style="text-align:center;" |1 |
| style="text-align:center;" |1 |
||
| Line 1,814: | Line 2,322: | ||
| style="text-align:center;" |2 |
| style="text-align:center;" |2 |
||
|Fish 5 fishes |
|Fish 5 fishes |
||
| − | |See |
+ | |See {{Section link||Fisher}} for info |
|- |
|- |
||
| style="text-align:center;" |3 |
| style="text-align:center;" |3 |
||
| Line 1,822: | Line 2,330: | ||
| style="text-align:center;" |4 |
| style="text-align:center;" |4 |
||
|Buy 3 Coca-Cola |
|Buy 3 Coca-Cola |
||
| − | |See |
+ | |See {{Section link||Market}} for info |
|- |
|- |
||
| style="text-align:center;" |5 |
| style="text-align:center;" |5 |
||
| Line 1,834: | Line 2,342: | ||
| style="text-align:center;" |7 |
| style="text-align:center;" |7 |
||
|Buy a corn flake |
|Buy a corn flake |
||
| − | |See |
+ | |See {{Section link||Market}} for info |
|- |
|- |
||
| style="text-align:center;" |8 |
| style="text-align:center;" |8 |
||
| Line 1,846: | Line 2,354: | ||
===Quest 02: The lost keys=== |
===Quest 02: The lost keys=== |
||
| − | '''Reward''': EXP +3000, QP$ +20 |
+ | '''Reward''': EXP +3000, QP$ +20, Potion shop becomes available |
| − | {| class="wikitable" |
+ | {| class="wikitable sortable centertext" |
| + | ! style="width: 50px;" |№ |
||
| − | !№ |
||
| − | !Description |
+ | ! style="width: 175px;" |Description |
| + | ! style="width: 275px;" |Tips |
||
| − | !Tips |
||
|- |
|- |
||
| style="text-align:center;" |1 |
| style="text-align:center;" |1 |
||
| Line 1,887: | Line 2,395: | ||
===Quest 03: Theft === |
===Quest 03: Theft === |
||
'''Reward''': EXP +3000, QP$ +20 |
'''Reward''': EXP +3000, QP$ +20 |
||
| − | {| class="wikitable" |
+ | {| class="wikitable sortable centertext" |
| + | ! style="width: 50px;" |№ |
||
| − | !№ |
||
| − | !Description |
+ | ! style="width: 175px;" |Description |
| + | ! style="width: 275px;" |Tips |
||
| − | !Tips |
||
|- |
|- |
||
| style="text-align:center;" |1 |
| style="text-align:center;" |1 |
||
| Line 1,918: | Line 2,426: | ||
| style="text-align:center;" |7 |
| style="text-align:center;" |7 |
||
|Enter in the bank while it's being robbed |
|Enter in the bank while it's being robbed |
||
| − | |See |
+ | |See {{Section link||Bank robbery}} for info |
|- |
|- |
||
| style="text-align:center;" |8 |
| style="text-align:center;" |8 |
||
|Look for some clue in the bank |
|Look for some clue in the bank |
||
| − | |You need to |
+ | |Bank Rob: You need to go on the 2nd floor and use Shrink Potion to go under the table and get the clue lying on the floor |
|- |
|- |
||
| style="text-align:center;" |9 |
| style="text-align:center;" |9 |
||
| Line 1,961: | Line 2,469: | ||
|} |
|} |
||
| − | ===Quest 04: The |
+ | ===Quest 04: The sauce is gone! === |
| − | '''Reward''': EXP +3000, QP$ +20 |
+ | '''Reward''': EXP +3000, QP$ +20, Pizzeria becomes available |
| − | {| class="wikitable" |
+ | {| class="wikitable sortable centertext" |
| + | ! style="width: 50px;" |№ |
||
| − | !№ |
||
| − | !Description |
+ | ! style="width: 175px;" |Description |
| + | ! style="width: 275px;" |Tips |
||
| − | !Tips |
||
|- |
|- |
||
| style="text-align:center;" |1 |
| style="text-align:center;" |1 |
||
|Talk with Kariina |
|Talk with Kariina |
||
| − | |Kariina is standing next to |
+ | |Kariina is standing next to Pizzeria |
|- |
|- |
||
| style="text-align:center;" |2 |
| style="text-align:center;" |2 |
||
| Line 1,978: | Line 2,486: | ||
| style="text-align:center;" |3 |
| style="text-align:center;" |3 |
||
|Go to the Seed store |
|Go to the Seed store |
||
| − | |See {{Section link||Seed store}} for info |
+ | | colspan="1" rowspan="2" |See {{Section link||Seed store}} for info |
|- |
|- |
||
| style="text-align:center;" |4 |
| style="text-align:center;" |4 |
||
|Buy a seed |
|Buy a seed |
||
| − | |{{bc}} |
||
|- |
|- |
||
| style="text-align:center;" |5 |
| style="text-align:center;" |5 |
||
|Go to your house |
|Go to your house |
||
| + | | colspan="1" rowspan="2" | |
||
| − | | |
||
| + | For the next steps you'll need to buy a {{Section link||House}}, |
||
| + | and a garden bed (house build mode,worth $4,000) |
||
|- |
|- |
||
| style="text-align:center;" |6 |
| style="text-align:center;" |6 |
||
| |
| |
||
| + | Plant a seed in your house. |
||
| − | | |
||
| + | *(You'll need to use a garden!) |
||
|- |
|- |
||
| style="text-align:center;" |7 |
| style="text-align:center;" |7 |
||
| + | |Harvest a tomato plant |
||
| − | | |
||
| |
| |
||
|- |
|- |
||
| style="text-align:center;" |8 |
| style="text-align:center;" |8 |
||
| + | |Go to the seed store |
||
| − | | |
||
| |
| |
||
|- |
|- |
||
| style="text-align:center;" |9 |
| style="text-align:center;" |9 |
||
| + | |Buy a water bucket |
||
| − | | |
||
| |
| |
||
|- |
|- |
||
| style="text-align:center;" |10 |
| style="text-align:center;" |10 |
||
| + | |Go to the market |
||
| |
| |
||
| + | |- |
||
| + | | style="text-align:center;" |11 |
||
| + | |Buy some salt |
||
| + | | |
||
| + | |- |
||
| + | | style="text-align:center;" |12 |
||
| + | |Cook a sauce |
||
| + | (You'll need to use an oven!) |
||
| + | | |
||
| + | |- |
||
| + | | style="text-align:center;" |13 |
||
| + | |Give the sauce to Kariina |
||
| + | | |
||
| + | |- |
||
| + | | style="text-align:center;" |14 |
||
| + | |Plant a seed in your house |
||
| + | | |
||
| + | |- |
||
| + | | style="text-align:center;" |15 |
||
| + | |Harvest a pepper plant |
||
| + | | |
||
| + | |- |
||
| + | | style="text-align:center;" |16 |
||
| + | |Cook a spicy sauce |
||
| + | | |
||
| + | |- |
||
| + | | style="text-align:center;" |17 |
||
| + | |Give the spicy sauce to Kariina |
||
| + | | |
||
| + | |- |
||
| + | |18 |
||
| + | |Plant a seed in you house |
||
| + | | |
||
| + | |- |
||
| + | |19 |
||
| + | |Harvest wheat |
||
| + | | |
||
| + | |- |
||
| + | |20 |
||
| + | |Give wheat to Kariina |
||
| |
| |
||
|} |
|} |
||
===Quest 05: Kitchen Nightmares! === |
===Quest 05: Kitchen Nightmares! === |
||
| − | '''Reward''': EXP +3000, QP$ +20 |
+ | '''Reward''': EXP +3000, QP$ +20, Fridge for your house |
| − | {| class="wikitable" |
+ | {| class="wikitable sortable centertext" |
| + | ! style="width: 50px;" |№ |
||
| − | !№ |
||
| − | !Description |
+ | ! style="width: 175px;" |Description |
| + | ! style="width: 275px;" |Tips |
||
| − | !Tips |
||
|- |
|- |
||
| style="text-align:center;" |1 |
| style="text-align:center;" |1 |
||
|Talk to Remi |
|Talk to Remi |
||
| − | |Remi is at the |
+ | |Remi is at the restaurant on the island |
|- |
|- |
||
| style="text-align:center;" |2 |
| style="text-align:center;" |2 |
||
| − | |Make |
+ | |Make Loaf of Bread |
| − | |For the recipes, see {{Section link||Oven recipes}} |
+ | | colspan="1" rowspan="13" |For the recipes, see {{Section link||Oven recipes}} |
|- |
|- |
||
| style="text-align:center;" |3 |
| style="text-align:center;" |3 |
||
| − | |Make |
+ | |Make Salad |
| − | |For the recipes, see {{Section link||Oven recipes}} |
||
|- |
|- |
||
| style="text-align:center;" |4 |
| style="text-align:center;" |4 |
||
| − | |Make |
+ | |Make Chocolate Cake |
| − | |For the recipes, see {{Section link||Oven recipes}} |
||
|- |
|- |
||
| style="text-align:center;" |5 |
| style="text-align:center;" |5 |
||
| − | |Make |
+ | |Make Frogwich |
| − | |For the recipes, see {{Section link||Oven recipes}} |
||
|- |
|- |
||
| style="text-align:center;" |6 |
| style="text-align:center;" |6 |
||
| − | |Make |
+ | |Make Fries |
| − | |For the recipes, see {{Section link||Oven recipes}} |
||
|- |
|- |
||
| style="text-align:center;" |7 |
| style="text-align:center;" |7 |
||
| − | |Make |
+ | |Make Pudding |
| − | |For the recipes, see {{Section link||Oven recipes}} |
||
|- |
|- |
||
| style="text-align:center;" |8 |
| style="text-align:center;" |8 |
||
| − | |Make |
+ | |Make Garlic Bread |
| − | |For the recipes, see {{Section link||Oven recipes}} |
||
|- |
|- |
||
| style="text-align:center;" |9 |
| style="text-align:center;" |9 |
||
| − | |Make |
+ | |Make Fish Stew |
| − | |For the recipes, see {{Section link||Oven recipes}} |
||
|- |
|- |
||
| style="text-align:center;" |10 |
| style="text-align:center;" |10 |
||
| − | |Make |
+ | |Make Grilled Cheese |
| − | |For the recipes, see {{Section link||Oven recipes}} |
||
|- |
|- |
||
| style="text-align:center;" |11 |
| style="text-align:center;" |11 |
||
| − | |Make |
+ | |Make Fish Burger |
| − | |For the recipes, see {{Section link||Oven recipes}} |
||
|- |
|- |
||
| style="text-align:center;" |12 |
| style="text-align:center;" |12 |
||
| − | |Make |
+ | |Make Bruschetta |
| − | |For the recipes, see {{Section link||Oven recipes}} |
||
|- |
|- |
||
| style="text-align:center;" |13 |
| style="text-align:center;" |13 |
||
| − | |Make |
+ | |Make Lemonade |
| − | |For the recipes, see {{Section link||Oven recipes}} |
||
|- |
|- |
||
| style="text-align:center;" |14 |
| style="text-align:center;" |14 |
||
| − | |Make |
+ | |Make Pierogies |
| − | |For the recipes, see {{Section link||Oven recipes}} |
||
|- |
|- |
||
| style="text-align:center;" |15 |
| style="text-align:center;" |15 |
||
|Talk to Remi |
|Talk to Remi |
||
| − | |Remi is at the |
+ | |Remi is at the restaurant on the island |
|- |
|- |
||
| style="text-align:center;" |16 |
| style="text-align:center;" |16 |
||
| Line 2,082: | Line 2,621: | ||
| style="text-align:center;" |17 |
| style="text-align:center;" |17 |
||
|Talk to Remi |
|Talk to Remi |
||
| − | |Remi is at the |
+ | |Remi is at the restaurant on the island |
|} |
|} |
||
| Line 2,089: | Line 2,628: | ||
Each recipe needs some ingredients to be made. |
Each recipe needs some ingredients to be made. |
||
===List of recipes=== |
===List of recipes=== |
||
| − | {| class="wikitable" cellspacing="1" cellpadding="1" border="1" align="left" |
+ | {| class="wikitable" style="text-align:center" cellspacing="1" cellpadding="1" border="1" align="left" |
|- |
|- |
||
! scope="col" style="text-align:center;" |Image |
! scope="col" style="text-align:center;" |Image |
||
! scope="col" style="text-align:center;" |Name |
! scope="col" style="text-align:center;" |Name |
||
! colspan="3" rowspan="1" scope="col" style="text-align:center;" |Recipe |
! colspan="3" rowspan="1" scope="col" style="text-align:center;" |Recipe |
||
| + | |- |
||
| + | | colspan="1" rowspan="3" | |
||
| + | | colspan="1" rowspan="3" | |
||
| + | '''Fish and Chips''' |
||
| + | *14 of energy |
||
| + | *29 of food |
||
| + | *Selling price: $525 |
||
| + | |[[File:WheatFlour2.png]] |
||
| + | |Wheat Flour |
||
| + | |1 |
||
| + | |- |
||
| + | |[[File:Frenchfries.png]] |
||
| + | |Fries |
||
| + | |1 |
||
| + | |- |
||
| + | |[[File:Mycity - Cat Fish.png]] |
||
| + | |Cat Fish |
||
| + | |1 |
||
| + | |- |
||
| + | | colspan="1" rowspan="4" | |
||
| + | | colspan="1" rowspan="4" | |
||
| + | '''Garlic Mashed Potatoes''' |
||
| + | *15 of energy |
||
| + | *19 of food |
||
| + | *Selling price: $183 |
||
| + | |[[File:Potato-0.png]] |
||
| + | |Potato |
||
| + | |2 |
||
| + | |- |
||
| + | |[[File:Mycity - Milk bottle.png]] |
||
| + | |Milk |
||
| + | |1 |
||
| + | |- |
||
| + | |[[File:Mycity - Salt.png]] |
||
| + | |Salt |
||
| + | |1 |
||
| + | |- |
||
| + | |[[File:Garlic3.png]] |
||
| + | |Garlic |
||
| + | |2 |
||
|- |
|- |
||
| colspan="1" rowspan="5" |[[File:Pierogies.png]] |
| colspan="1" rowspan="5" |[[File:Pierogies.png]] |
||
| Line 2,105: | Line 2,684: | ||
|2 |
|2 |
||
|- |
|- |
||
| − | |[[File:Potato.png]] |
+ | |[[File:Potato-0.png]] |
|Potato |
|Potato |
||
|2 |
|2 |
||
| Line 2,121: | Line 2,700: | ||
|1 |
|1 |
||
|- |
|- |
||
| − | | colspan="1" rowspan="4" | |
+ | | colspan="1" rowspan="4" |[[File:FishBurger.png]] |
| colspan="1" rowspan="4" | |
| colspan="1" rowspan="4" | |
||
'''Fish Burger''' |
'''Fish Burger''' |
||
| Line 2,165: | Line 2,744: | ||
|1 |
|1 |
||
|- |
|- |
||
| − | | colspan="1" rowspan="5" | |
+ | | colspan="1" rowspan="5" |[[File:Banana Cake.png]] |
| colspan="1" rowspan="5" | |
| colspan="1" rowspan="5" | |
||
'''Banana Cake''' |
'''Banana Cake''' |
||
| Line 2,187: | Line 2,766: | ||
|1 |
|1 |
||
|- |
|- |
||
| + | |[[File:Banana.png]] |
||
| − | |TBA |
||
|Banana |
|Banana |
||
|2 |
|2 |
||
| Line 2,249: | Line 2,828: | ||
|1 |
|1 |
||
|- |
|- |
||
| − | | colspan="1" rowspan="3" | |
+ | | colspan="1" rowspan="3" |[[File:Sauce.png]] |
| colspan="1" rowspan="3" | |
| colspan="1" rowspan="3" | |
||
'''Tomato Sauce''' |
'''Tomato Sauce''' |
||
| Line 2,285: | Line 2,864: | ||
|1 |
|1 |
||
|- |
|- |
||
| − | | colspan="1" rowspan="3" | |
+ | | colspan="1" rowspan="3" |[[File:Milkshake.png]] |
| colspan="1" rowspan="3" | |
| colspan="1" rowspan="3" | |
||
'''Milkshake''' |
'''Milkshake''' |
||
| Line 2,303: | Line 2,882: | ||
|1 |
|1 |
||
|- |
|- |
||
| − | | colspan="1" rowspan=" |
+ | | colspan="1" rowspan="3" | |
| + | | colspan="1" rowspan="3" | |
||
| + | '''Mushroom Burger''' |
||
| + | *20 of energy |
||
| + | *43 of food |
||
| + | *Selling price: $400 |
||
| + | |[[File:Garlic3.png]] |
||
| + | |Garlic |
||
| + | |1 |
||
| + | |- |
||
| + | | |
||
| + | |Mushroom |
||
| + | |2 |
||
| + | |- |
||
| + | |[[File:Bread-0.png]] |
||
| + | |Loaf of Bread |
||
| + | |1 |
||
| + | |- |
||
| + | | colspan="1" rowspan="2" |[[File:GrilledCheese.png]] |
||
| colspan="1" rowspan="2" | |
| colspan="1" rowspan="2" | |
||
'''Grilled Cheese''' |
'''Grilled Cheese''' |
||
| Line 2,317: | Line 2,914: | ||
|1 |
|1 |
||
|- |
|- |
||
| − | | colspan="1" rowspan="6" |[[File: |
+ | | colspan="1" rowspan="6" |[[File:Waffles.png]] |
| colspan="1" rowspan="6" | |
| colspan="1" rowspan="6" | |
||
'''Waffles''' |
'''Waffles''' |
||
| Line 2,343: | Line 2,940: | ||
|3 |
|3 |
||
|- |
|- |
||
| − | |[[File:Honey.png]] |
+ | |[[File:Honey Mycity.png]] |
|Honey |
|Honey |
||
|1 |
|1 |
||
| Line 2,353: | Line 2,950: | ||
*3 of food |
*3 of food |
||
*Selling price: $152 |
*Selling price: $152 |
||
| − | |[[File:Potato.png]] |
+ | |[[File:Potato-0.png]] |
|Potato |
|Potato |
||
|2 |
|2 |
||
| Line 2,397: | Line 2,994: | ||
|2 |
|2 |
||
|- |
|- |
||
| − | | colspan="1" rowspan="6" | |
+ | | colspan="1" rowspan="6" |[[File:Fish Stew.png]] |
| colspan="1" rowspan="6" | |
| colspan="1" rowspan="6" | |
||
'''Fish Stew''' |
'''Fish Stew''' |
||
| Line 2,423: | Line 3,020: | ||
|1 |
|1 |
||
|- |
|- |
||
| − | | style="text-align:center;" |[[File: |
+ | | style="text-align:center;" |[[File:Garlic3.png]] |
|Garlic |
|Garlic |
||
| + | |1 |
||
| + | |- |
||
| + | | colspan="1" rowspan="6" | |
||
| + | | colspan="1" rowspan="6" | |
||
| + | '''Breaded Cutlet''' |
||
| + | *30 of energy |
||
| + | *99 of food |
||
| + | *Selling price: $417 |
||
| + | | style="text-align:center;" |[[File:Egg2.png]] |
||
| + | |Egg |
||
| + | |2 |
||
| + | |- |
||
| + | | |
||
| + | |Meat |
||
| + | |2 |
||
| + | |- |
||
| + | |[[File:Mycity - Salt.png]] |
||
| + | |Salt |
||
| + | |1 |
||
| + | |- |
||
| + | |[[File:Mycity - Pepper.png]] |
||
| + | |Pepper |
||
| + | |1 |
||
| + | |- |
||
| + | |[[File:Garlic3.png]] |
||
| + | |Garlic |
||
| + | |1 |
||
| + | |- |
||
| + | |[[File:WheatFlour2.png]] |
||
| + | |Wheat Flour |
||
|1 |
|1 |
||
|- |
|- |
||
| Line 2,453: | Line 3,080: | ||
|2 |
|2 |
||
|- |
|- |
||
| − | | colspan="1" rowspan="6" | |
+ | | colspan="1" rowspan="6" |[[File:Croquettes.png]] |
| colspan="1" rowspan="6" | |
| colspan="1" rowspan="6" | |
||
'''Potato Croquettes''' |
'''Potato Croquettes''' |
||
| Line 2,463: | Line 3,090: | ||
|2 |
|2 |
||
|- |
|- |
||
| − | |[[File:Potato.png]] |
+ | |[[File:Potato-0.png]] |
|Potato |
|Potato |
||
|3 |
|3 |
||
| Line 2,483: | Line 3,110: | ||
|1 |
|1 |
||
|- |
|- |
||
| − | | colspan="1" rowspan="2" | |
+ | | colspan="1" rowspan="2" |[[File:Sashimi.png]] |
| colspan="1" rowspan="2" | |
| colspan="1" rowspan="2" | |
||
'''Sashimi''' |
'''Sashimi''' |
||
| − | *31 |
+ | *31 of energy |
| − | *59 |
+ | *59 of food |
*Selling price: $12627 |
*Selling price: $12627 |
||
|[[File:Mycity - Lemon.png]] |
|[[File:Mycity - Lemon.png]] |
||
| Line 2,497: | Line 3,124: | ||
|1 |
|1 |
||
|- |
|- |
||
| − | | colspan="1" rowspan="4" | |
+ | | colspan="1" rowspan="4" |[[File:Hotsauce.png]] |
| colspan="1" rowspan="4" | |
| colspan="1" rowspan="4" | |
||
'''Hot Sauce''' |
'''Hot Sauce''' |
||
| Line 2,519: | Line 3,146: | ||
|2 |
|2 |
||
|- |
|- |
||
| − | | colspan="1" rowspan="4" | |
+ | | colspan="1" rowspan="4" |[[File:Cookies.png]] |
| colspan="1" rowspan="4" | |
| colspan="1" rowspan="4" | |
||
'''Cookies''' |
'''Cookies''' |
||
| Line 2,541: | Line 3,168: | ||
|1 |
|1 |
||
|- |
|- |
||
| − | | colspan="1" rowspan="6" | |
+ | | colspan="1" rowspan="6" |[[File:Pizza.png]] |
| colspan="1" rowspan="6" | |
| colspan="1" rowspan="6" | |
||
'''Pizza''' |
'''Pizza''' |
||
| Line 2,559: | Line 3,186: | ||
|2 |
|2 |
||
|- |
|- |
||
| + | |[[File:Sauce.png]] |
||
| − | |TBA |
||
|Tomato Sauce |
|Tomato Sauce |
||
|1 |
|1 |
||
| Line 2,603: | Line 3,230: | ||
|1 |
|1 |
||
|- |
|- |
||
| − | | style="text-align:center;" |[[File: |
+ | | style="text-align:center;" |[[File:Garlic3.png]] |
|Garlic |
|Garlic |
||
|1 |
|1 |
||
| Line 2,615: | Line 3,242: | ||
|1 |
|1 |
||
|- |
|- |
||
| − | | colspan="1" rowspan="2" |[[File:HotChocolate.png |
+ | | colspan="1" rowspan="2" |[[File:HotChocolate.png]] |
| colspan="1" rowspan="2" | |
| colspan="1" rowspan="2" | |
||
'''Hot Chocolate''' |
'''Hot Chocolate''' |
||
| Line 2,628: | Line 3,255: | ||
|Milk bottle |
|Milk bottle |
||
|1 |
|1 |
||
| + | |- |
||
| + | | colspan="1" rowspan="3" | |
||
| + | | colspan="1" rowspan="3" | |
||
| + | '''Cream of Mushroom''' |
||
| + | *7 of energy |
||
| + | *28 of food |
||
| + | *Selling price: $383 |
||
| + | |[[File:Mycity - Milk bottle.png]] |
||
| + | |Milk bottle |
||
| + | |1 |
||
| + | |- |
||
| + | | |
||
| + | |Mushroom |
||
| + | |2 |
||
| + | |- |
||
| + | |[[File:Mycity - Salt.png]] |
||
| + | |Salt |
||
| + | |1 |
||
| + | |- |
||
| + | | colspan="1" rowspan="5" | |
||
| + | | colspan="1" rowspan="5" | |
||
| + | '''Pumpkin Pie''' |
||
| + | *102 of energy |
||
| + | *132 of food |
||
| + | *Selling price: $828 |
||
| + | | style="text-align:center;" |[[File:Egg2.png]] |
||
| + | |Egg |
||
| + | |2 |
||
| + | |- |
||
| + | |[[File:WheatFlour2.png]] |
||
| + | |Wheat Flour |
||
| + | |2 |
||
| + | |- |
||
| + | |[[File:Mycity - Pumpkin (item).png]] |
||
| + | |Pumpkin |
||
| + | |1 |
||
| + | |- |
||
| + | |[[File:Honey Mycity.png]] |
||
| + | |Honey |
||
| + | |1 |
||
| + | |- |
||
| + | |[[File:Mycity - Sugar.png]] |
||
| + | |Sugar |
||
| + | |1 |
||
| + | |- |
||
| + | | colspan="1" rowspan="3" | |
||
| + | | colspan="1" rowspan="3" | |
||
| + | '''Meatballs''' |
||
| + | *39 of energy |
||
| + | *82 of food |
||
| + | *Selling price: $415 |
||
| + | | |
||
| + | |Meat |
||
| + | |3 |
||
| + | |- |
||
| + | |[[File:Hotsauce.png]] |
||
| + | |Hot sauce |
||
| + | |1 |
||
| + | |- |
||
| + | |[[File:Mycity - Salt.png]] |
||
| + | |Salt |
||
| + | |1 |
||
| + | |- |
||
| + | | colspan="1" rowspan="3" | |
||
| + | | colspan="1" rowspan="3" | |
||
| + | '''Steak Frites''' |
||
| + | *10 of energy |
||
| + | *46 of food |
||
| + | *Selling price: $402 |
||
| + | | |
||
| + | |Meat |
||
| + | |2 |
||
| + | |- |
||
| + | |[[File:Frenchfries.png]] |
||
| + | |Fries |
||
| + | |1 |
||
| + | |- |
||
| + | |[[File:Mycity - Salt.png]] |
||
| + | |Salt |
||
| + | |1 |
||
| + | |- |
||
| + | | colspan="1" rowspan="6" | |
||
| + | | colspan="1" rowspan="6" | |
||
| + | '''Lasagna''' |
||
| + | *55 of energy |
||
| + | *118 of food |
||
| + | *Selling price: $640 |
||
| + | | |
||
| + | |Meat |
||
| + | |2 |
||
| + | |- |
||
| + | |[[File:Mycity - Water bucket.png]] |
||
| + | |Water bucket |
||
| + | |1 |
||
| + | |- |
||
| + | |[[File:Mycity - Salt.png]] |
||
| + | |Salt |
||
| + | |1 |
||
| + | |- |
||
| + | |[[File:Sauce.png]] |
||
| + | |Sauce |
||
| + | |1 |
||
| + | |- |
||
| + | |[[File:WheatFlour2.png]] |
||
| + | |Wheat Flour |
||
| + | |1 |
||
| + | |- |
||
| + | |[[File:Mycity - Cheese.png]] |
||
| + | |Cheese |
||
| + | |2 |
||
| + | |- |
||
| + | | colspan="1" rowspan="3" | |
||
| + | | colspan="1" rowspan="3" | |
||
| + | '''Cheeseburger''' |
||
| + | *20 of energy |
||
| + | *54 of food |
||
| + | *Selling price: $500 |
||
| + | |[[File:Mycity - Cheese.png]] |
||
| + | |Cheese |
||
| + | |1 |
||
| + | |- |
||
| + | |[[File:Bread-0.png]] |
||
| + | |Loaf of Bread |
||
| + | |1 |
||
| + | |- |
||
| + | | |
||
| + | |Meat |
||
| + | |2 |
||
|} |
|} |
||
| Line 2,647: | Line 3,402: | ||
|[[File:Mycity - Classic House - interior.png|125px]] |
|[[File:Mycity - Classic House - interior.png|125px]] |
||
| style="text-align: left;" |Classic House |
| style="text-align: left;" |Classic House |
||
| − | |$ |
+ | |$2,000 |
|{{bc}} |
|{{bc}} |
||
|- |
|- |
||
| Line 2,653: | Line 3,408: | ||
|[[File:Mycity - Family House - interior.png|125px]] |
|[[File:Mycity - Family House - interior.png|125px]] |
||
| style="text-align: left;" |Family House |
| style="text-align: left;" |Family House |
||
| − | |$ |
+ | |$7,000 |
|{{bc}} |
|{{bc}} |
||
|- |
|- |
||
| Line 2,680: | Line 3,435: | ||
|{{bc}} |
|{{bc}} |
||
|- |
|- |
||
| − | |[[File:House10-icon.png |
+ | |[[File:House10-icon.png|150x150px]] |
| + | |[[File:M house.png|171x171px]] |
||
| − | | |
||
|Modern House |
|Modern House |
||
|$100,000 |
|$100,000 |
||
|{{bc}} |
|{{bc}} |
||
| + | |- |
||
| + | |[[File:Igloo.png|209x209px]] |
||
| + | |[[File:Iglo2 preview rev 2.png|133x133px]] |
||
| + | |Igloo House |
||
| + | |$150,000 |
||
| + | |Event |
||
| + | |- |
||
| + | |[[File:Snw.png]] |
||
| + | |[[File:Globe.png|135x135px]] |
||
| + | |Snowball House |
||
| + | |$200,000 |
||
| + | |<blockquote>Event</blockquote> |
||
|} |
|} |
||
| Line 2,743: | Line 3,510: | ||
***Crops |
***Crops |
||
***Sales |
***Sales |
||
| + | ***Fruits Sold |
||
**Chef |
**Chef |
||
***Cooked dishes |
***Cooked dishes |
||
| Line 2,757: | Line 3,525: | ||
Both stats can be regained by using food and drinks. Energy, however, is also regained automatically. |
Both stats can be regained by using food and drinks. Energy, however, is also regained automatically. |
||
| − | == |
+ | ==Gallery== |
| + | <gallery type=slideshow position=left> |
||
| − | [[File:Mycity - boat.png|thumb|The boat]] |
||
| + | Mycity - BMW.png|BMW |
||
| − | At the right side of the bag is available a vehicles button ([[File:Mycity - vehicles.png]]). Using this menu, players can spawn vehicles (see {{Section link||Car dealership}} and {{Section link||Boat Shop (dealerSHIP)}} for lists), including the boat obtained through the quest. |
||
| + | Mycity - boat.png|Boat |
||
| + | Mycity - Classic XI.png|Classic XI |
||
| + | Mycity - Ferrari 488.png|Ferrari 488 |
||
| + | Mycity - Goldie.png|Goldie |
||
| + | Mycity - Josef.png|Josef |
||
| + | Mycity - Lamborghini.png|Lamborghini |
||
| + | Mycity - leaderboard.png|Leaderboard |
||
| + | Mycity - Pumpkin (furniture).png|Pumpkin (furniture) |
||
| + | Mycity - Miner.png|Miner |
||
| + | Mycity - Mini Cooper.png|Mini Cooper |
||
| + | Mycity - Josef - big.png|Josef - big |
||
| + | Mycity - Miner - big.png|Miner - big |
||
| + | Mycity - mine entry.png|Mine entry |
||
| + | Mycity - mine elevator.png|Mine elevator |
||
| + | Mycity - mine area 1.png|Mine area 1 |
||
| + | Mycity - mine area 4.png|Mine area 4 |
||
| + | Mycity - mine area 5.png|Mine area 5 |
||
| + | Mycity - house.png|House |
||
| + | Mycity - police station - interior.png|Police station - interior |
||
| + | Mycity - pet shop.png|Pet shop |
||
| + | Mycity - Robber.png|Robber |
||
| + | Mycity - Cookies.png|Cookies |
||
| + | Mycity - Hot sauce.png|Hot sauce |
||
| + | Mycity - Pepper seed.png|Pepper seed |
||
| + | Mycity - Pizza.png|Pizza |
||
| + | Mycity - Sauce.png|Sauce |
||
| + | Mycity - Hot Chocolate.png|Hot Chocolate |
||
| + | Mycity - Milkshake.png|Milkshake |
||
| + | Mycity - Motorboat.png|Motorboat |
||
| + | Mycity - Yacht.png|Yacht |
||
| + | Mycity - Tugship.png|Tugship |
||
| + | Mycity - Bugatti.png|Bugatti |
||
| + | Waffles2.png|Waffles2 |
||
| + | Garlic2.png|Garlic2 |
||
| + | Bread.png|Bread |
||
| + | Egg.png|Egg |
||
| + | House 10.png|House 10 |
||
| + | Chokp.png |
||
| + | Bnbn.png |
||
| + | </gallery> |
||
| + | {{clear}} |
||
| + | |||
| + | ==External links== |
||
| + | *[https://discord.gg/Uu3CbPf Discord server] |
||
| + | *[https://github.com/Chrystiang/mycity Lua script] |
||
{{Game modes}} |
{{Game modes}} |
||
Latest revision as of 14:44, 1 January 2024


Mycity is a module that is city-like. In it houses can be bought and various jobs and quests are available.
At least 4 players are required for the module to play at non-international rooms (en-#mycity[1-9]) and at least 2 players for international rooms (*#mycity[1-9]).
It was previously available at "#paintball0mycity".
Titles[]
A title was added on 12 January 2022 (V1.682).
| ID | Male title | Female title | Achievement | ||
|---|---|---|---|---|---|
| 535 | Tycoon | Spend 5,000,000 coins | |||
Characters[]
NPCs' (clients) locations on the map, in a broadly clockwise order:
- Mine shop: John
- Undeground boat shop: Blank (accessible only when the path to the boat shop is open)
- Mine job site: Paulo, Heinrich, Rupe
- Mine entrance: Goldie
- Jason's Workshop: Jason (inaccessible at night)
- Police station: Sherlock, Sebastian, Paul, Alexa
- Bank: Colt (inaccessible at night)
- Market: Pablo, Derek, Billy, Gominha, Julie, Natasha, Cassy
- Pizzeria: Louis, Lauren, Marie, *Souris, Kariina
- Outside furniture store: Daniel (upgrade backpack $5000 ,max 70)
- Furniture store: Iho, Chrystian (inaccessible at night)
- Fish 'N Bait: Bill, Patric
- Outside potion shop: Mrsbritt87
- Potion shop: Indy (inaccessible at night)
- Restaurant: Bruna, Luan, Weth, Gui, Ana, Gabe, Remi, Lucas
- Café: Alicia
- Bridge: Santih
- Oliver's house: Marcus, Oliver, Anny
- Dave's tent: Lindsey, Dave, Kapo
- Seed store: Body (inaccessible at night)
- Beehives: Davi
Locations[]

A character that appears only when there are not enough players
A list of locations and the characters in them, from left to right.
Mine[]
City[]
| Exterior image | Interior image | Name | Characters | Closes at night | Notes | ||||||||||||
|---|---|---|---|---|---|---|---|---|---|---|---|---|---|---|---|---|---|
 |
"Jason's Workshop" (build shop) |
|
Can be robbed. | ||||||||||||||
 |
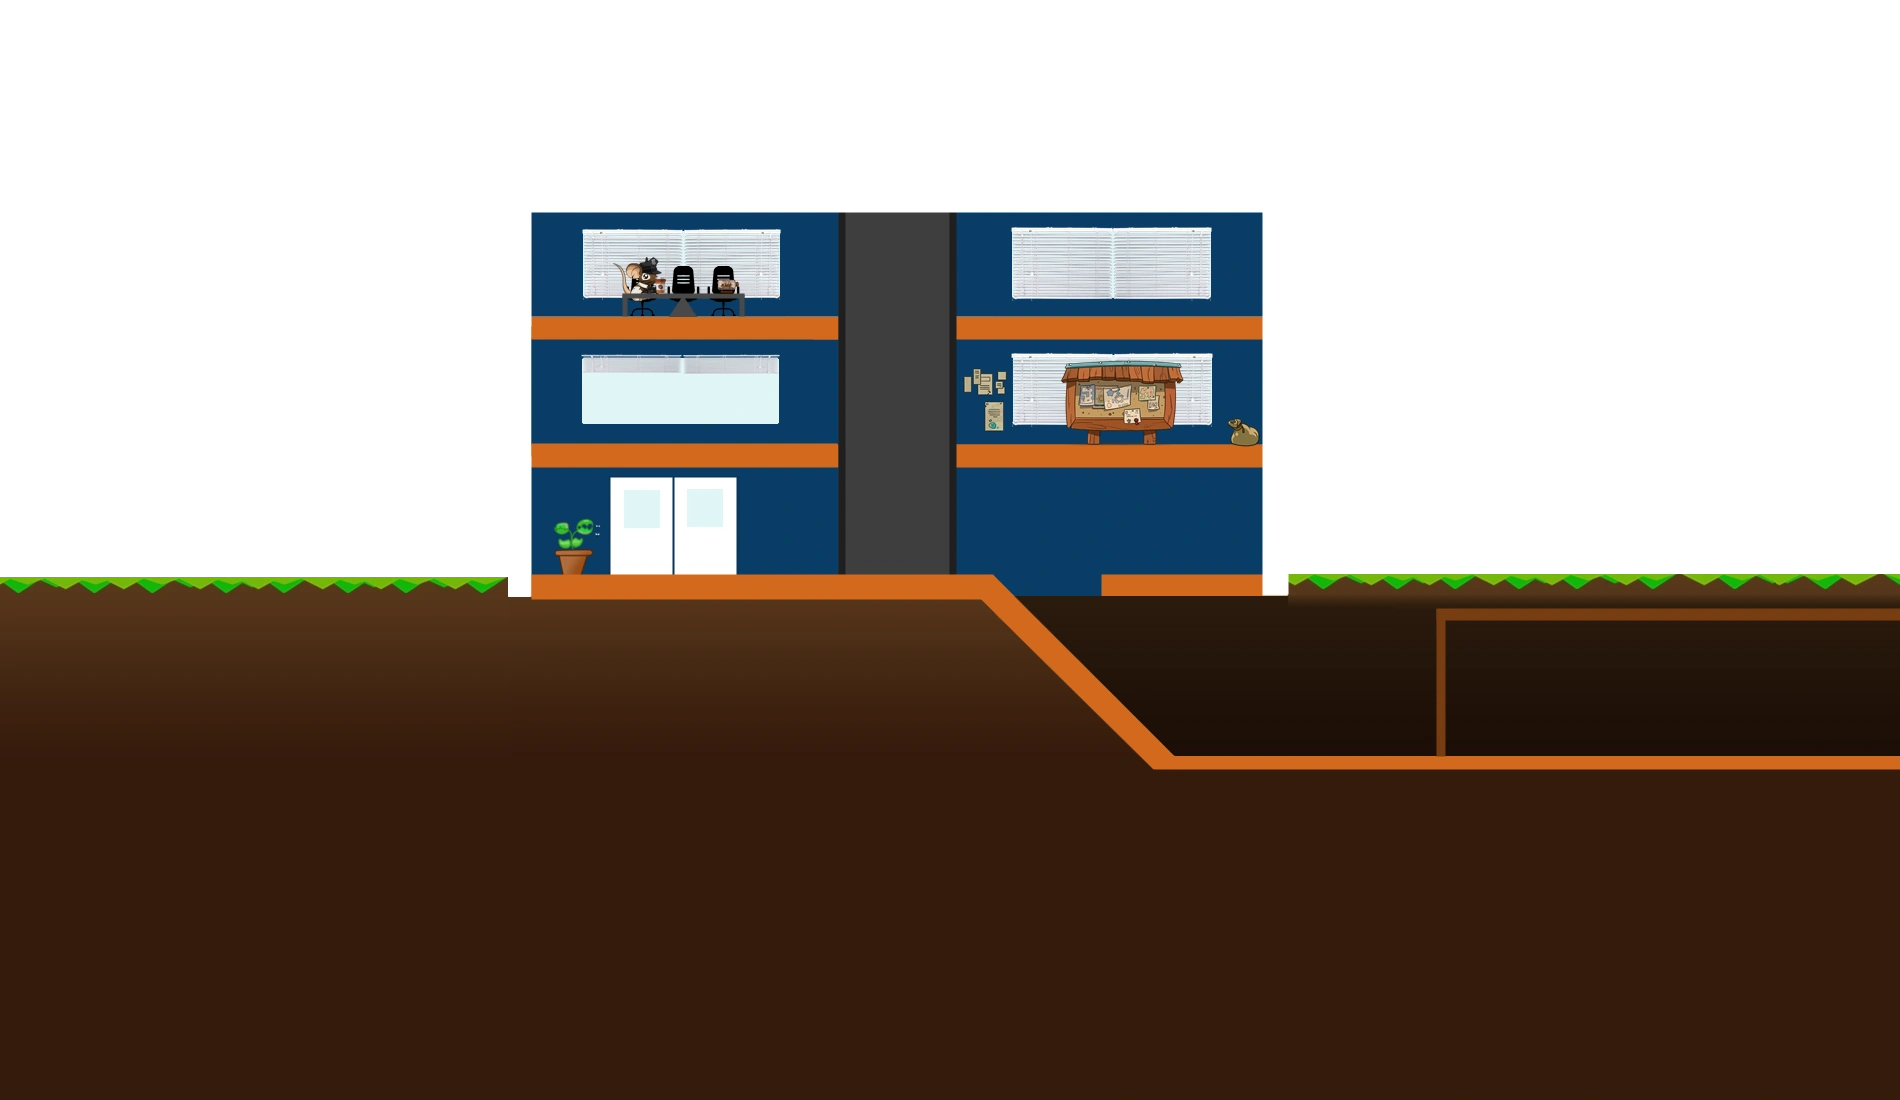 |
Police station |
|
Sherlock gives the cop job. | |||||||||||||
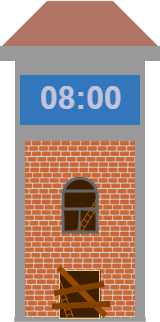 |
∅ | Clock tower | ∅ | ∅ | Displays the current time of Mycity. Time can also be seen by using the clock item. | ||||||||||||
 |
 |
Bank |
|
Can be robbed when it closes at night (see § Bank robbery). | |||||||||||||
 |
Market |
|
Can be robbed. For the items sold, see § Market. Pablo, who is at the right, gives the thief job. | ||||||||||||||
 |
Pizzeria |
|
Unlocked after completing quest #4. | ||||||||||||||
 |
|
Hospital | ∅ | Players heal here when their food stat is at 0. | |||||||||||||
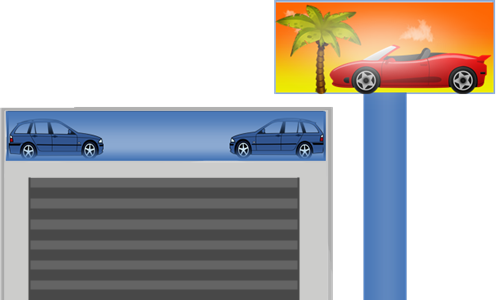 |
Car dealership | ∅ | For the cars sold, see § Car dealership. | ||||||||||||||
 |
Furniture store |
|
For the items sold, see § Furniture store. | ||||||||||||||
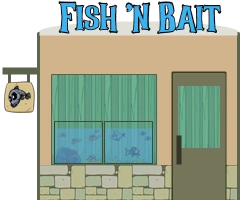 |
Fish 'N Bait |
|
For the info, see § Fisher. |


Island[]
To access the island, players need a boat, which is obtained after completing 1 quest.
| Exterior image | Interior image | Name | Characters | Closes at night | Notes | ||||||
|---|---|---|---|---|---|---|---|---|---|---|---|
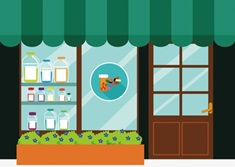 |
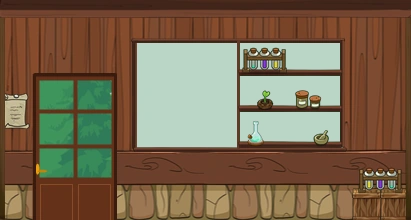 |
Potion shop |
|
For the items sold, see § Potion shop. | |||||||
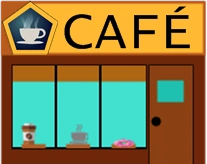 |
Café |
|
Can be robbed. For the items sold, see § Café. | ||||||||
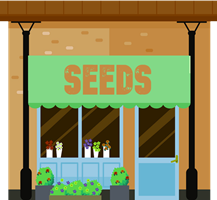 |
"Seeds" (seed store) |
|
For the items sold, see § Seed store. | ||||||||
 |
 |
Oliver's house |
|
Has a garden with 4 farming plots. Oliver gives the farmer job. For Marcus's shop, see § QP shop. Anny gives flour for wheat. | |||||||
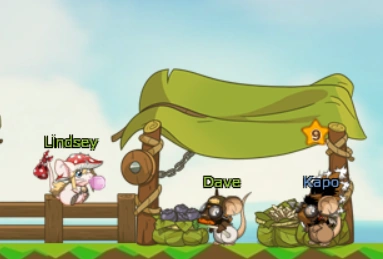
|
TBA | Dave's Tent |
|
For items, see § Dave's Tent. |
Controls[]
- B : Bag
- Q : Quest
- F : Car - jump up to get out of the car
- G : Boat - click on the ground to get out of the boat
- P : Profile
Jobs[]
All jobs can be joined by clicking on a character and then the "Work" button.
Cop[]
Cops can arrest thieves during their robbery timer by pressing Spacebar on them. By doing so, they earn money.
They are alerted when a robbery occurs by a message in the chat.
Chef[]
Chefs can deliver orders to NPC's. To become a Chef talk to Remi at his restaurant (on the right Island).
To deliver an order you need to stand next to character who placed the order and click on them (you need to have a wanted dish in your bag). Orders can be found on the orders screen at the restaurant.
Farmer[]
Farmers can plant seeds and harvest plants on the farming plots available at Oliver's garden or their houses. You can buy random seeds at the Seed Store. For players to plant or harvest at their own houses it is not required to be a farmer.
In the house you can activate the build mode by clicking to the house icon on mycity module menu.
And there you able to choose which plot do you want to place. (Pool which costs 4000$ or Garden which costs 4000$)
They also can sell seeds by clicking "Drop" in their inventory (Oliver and Lindsey)
Selling price
| Image | Name | Price |
|---|---|---|

|
Tomato seed | $10 |

|
Oregano seed | $30 |

|
Wheat seed | $40 |

|
Pepper seed | $70 |

|
Lemon seed | $120 |

|
Blueberry seed | $400 |

|
Banana Seedling | $800 |

|
Pumpkin seed | $500 |

|
Lucky Flower seed | $10,000 |
Fisher[]
Fishers can fish by pressing Spacebar near water (costs 10 energy). After some time, a message appears at the center of the screen with a picture of a fish. Then, the player must press Spacebar again to fish more.
Players also can sell fish to Patric by clicking "Drop" in their inventory.
Island, Santih "Here are a lot of people that still dare to fish in this pond."
Selling price
| ID | Image | Name | Price | Rarity |
|---|---|---|---|---|
| 44 | 
|
Smolty | $15 | Common |
| Mud Fish | $15 | Common | ||
| Sink Fish | $15 | Common | ||
| Bitty Fish | $300 | Rare | ||
| 45 | 
|
Lion Fish | $300 | Rare |
| 46 | 
|
Dog Fish | $300 | Rare |
| 47 |  
|
Cat Fish | $300 | Rare |
| 48 |  
|
Guppy | $50 | Common |
| 49 | 
|
Lobster | $1000 | Mythical |
| 50 | 
|
Goldenmare | $10000 | Legendary |
| 51 | 
|
Frog | $15 | Common |
- Cheese
- Wheat Seed
Miner[]
Miners can mine blocks with numbers by clicking on them. Sometimes blocks can contain ores. Not all blocks can be clicked, however, each block needs a certain number of clicks to be destroyed. The Ores can be sold to Goldie.
Ores
| Image | Name | Worth |
|---|---|---|

|
Yellow Crystal | $200 |

|
Blue Crystal | $342 |

|
Purple Crystal | $600 |

|
Green Crystal | $800 |

|
Red Crystal | $1200 |

|
Gold | $115 |
Blocks
| Image/color | Name | Click | Note |
|---|---|---|---|

|
Sand | 2 | ∅ |

|
Dirt | 5 | ∅ |

|
Coal | 20 | Yellow and blue crystals can be found in these blocks |

|
Stone | 50 | Yellow, blue and purple crystals can be found in these blocks |

|
Lava | 200 | Yellow and blue crystals can occasionally be found in these blocks, purple and green are more common |

|
Diamond | 500 | Green and red crystals can be found in these blocks, but also occasionally purple, blue and yellow crystals |

|
Tiplonium | 1000 | Mostly red but also all other types of crystals can be found in these blocks |

|
??? | 2000 | |

|
??? | 5000 |
Thief[]
Their nicknames are white (default color) but red during a robbery timer.
After a robbery, a timer appears until the robber receives the money. Robbers can only be arrested by cops during this timer. During it, robbers cannot enter the mine and Oliver's house.
A robber that gets arrested is sent to the jail inside the police station, but he can escape through the toilet until the jail timer is over. A message also gets sent to the chat: "The thief (thief's name) was arrested!"
Shop robbery[]
Shops can be robbed by pressing Spacebar on the characters inside them. The characters run away and after some time re-appear, allowing to rob them again. All shop robberies give $250.


The bubble
For a few seconds after a shop robbery, a bubble is on the robber, which prevents them from getting arrested immediately.
A list of characters that can be robbed and the shops they are inside is below.
| Exterior image | Interior image | Name | Characters | Closes at night | ||||||
|---|---|---|---|---|---|---|---|---|---|---|
|
"Jason's Workshop" (build shop) |
|
||||||||
|
Market |
|
||||||||
|
Café |
|
||||||||
 |
Pizzeria |
|
||||||||
 |
Restaurant |
|


Bank robbery[]

The bank at the beginning of a robbery

The interior of the bank
The bank can be robbed for $1100 when it closes at night (once every night). Players do not have to be robbers to rob the bank.
First, 2 ![]() dynamites must be used, one on the exterior door and another on the door at the left, inside.
dynamites must be used, one on the exterior door and another on the door at the left, inside.
After the exterior door explodes, the bank can be entered by going to the door (not by pressing the go button above the bank).
After the door at the left explodes, the robbers' screen starts flashing red and cops are alerted of the bank robbery. The bank cannot be entered anymore; the door looks normal again and "robbery in progress" text appears on the bank. Any players robbing the bank that are not robbers become robbers.
The gold vault is at the third floor but to obtain the gold a code is required, which can be entered in by clicking on the door of the vault. The code consists of 4 digits, 3 of which can be found on a paper (![]() ), which can be in the police station, the potion shop, the mine or other places. The last (4th) digit must be guessed. The code is different in every Mycity room but it does not change. Note that there is no backspace button, all digits must be entered for the entered code to reset. When the correct code is entered, it turns green.
), which can be in the police station, the potion shop, the mine or other places. The last (4th) digit must be guessed. The code is different in every Mycity room but it does not change. Note that there is no backspace button, all digits must be entered for the entered code to reset. When the correct code is entered, it turns green.
Then robbers can enter the vault and press Spacebar to obtain the gold. As with shop robberies, a timer starts until they receive the money.

Colt
If robbers do not exit the bank quickly enough, Colt appears near the door and prevents them from exiting the bank, by sending them to jail with a timer, similarly to player cops. A message in the chat regarding the arrest also appears.
List of items[]
The items can be accessed by clicking the bag (![]() ) at the bottom of the screen.
) at the bottom of the screen.
| ID | Image | Name | Still available | Plant |
|---|---|---|---|---|
| 1 | 
|
Sprite | ||
| 2 | 
|
Fanta | ||
| 3 | 
|
Coca-Cola | ||
| 4 | 
|
Pickaxe | ||
| 5 | 
|
Clock | ||
| 6 | 
|
Milk bottle | ||
| 7 |
|
Gold | ||
| 8 | 
|
Dynamite | ||
| 9 | 
|
Shrink Potion | ||
| 10 | 
|
Growth Potion | ||
| 11 | 
|
Coffee | ||
| 12 | 
|
Hot Chocolate | ||
| 13 | 
|
Milkshake | ||
| 14 | 
|
Seed | ||
| 15 | 
|
Fertilizer | ||
| 16 | 
|
Water bucket | ||
| 17 | 
|
Tomato | ||
| 18 |
|
Tomato seed | ||
| 19 | 
|
Oregano | ||
| 20 |
|
Oregano seed | ||
| 21 | 
|
Lemon | ||
| 22 |
|
Lemon seed | ||
| 23 | 
|
Salt | ||
| 24 | 
|
Pepper | ||
| 25 |
|
Pepper seed | ||
| 26 | 
|
Lucky Flower | ||
| 27 |
|
Lucky Flower seed | ||
| 28 | 
|
Sauce | ||
| 29 | 
|
Hot sauce | ||
| 30 | 
|
Dough | ||
| 31 | 
|
Wheat | ||
| 32 |
|
Wheat seed | ||
| 33 | 
|
Pizza | ||
| 34 | 
|
Corn Flakes | ||
| 35 | 
|
Pumpkin | ||
| 36 |
|
Pumpkin seed | ||
| 37 | 
|
Super Fertilizer | ||
| 38 | 
|
Cookies | ||
| 39 | 
|
Sugar | ||
| 40 | 
|
Chocolate | ||
| 41 | 
|
Blueberries | ||
| 42 |
|
Blueberry seed | ||
| 43 | 
|
Cheese | ||
| 44 |
|
Smolt Fry | ||
| 45 |
|
Lion Fish | ||
| 46 |
|
Dog Fish | ||
| 47 |
|
Cat Fish | ||
| 48 |
|
Runty Guppy | ||
| 49 |
|
Lobster | ||
| 50 |
|
Goldenmare | ||
| 51 |
|
Frog | ||
| 52 | 
|
Lemonade | ||
| 53 | 
|
Lobster Bisque | ||
| 54 | 
|
Loaf of Bread | ||
| 55 | 
|
Bruschetta | ||
| 56 | 
|
Waffles | ||
| 57 | Egg | |||
| 58 | 
|
Honey | ||
| 59 | 
|
Grilled Lobster | ||
| 60 | 
|
Frogwich | ||
| 61 | 
|
Chocolate Cake | ||
| 62 | 
|
Wheat Flour | ||
| 63 | 
|
Salad | ||
| 64 | 
|
Lettuce | ||
| 65 | 
|
Pierogies | ||
| 66 | 
|
Potato | ||
| 67 | 
|
Fries | ||
| 68 | 
|
Pudding | ||
| 69 | 
|
Garlic Bread | ||
| 70 | 
|
Garlic | ||
| 71 | 
|
Blueprint | ||
| 72 |
|
Yellow Crystal | ||
| 73 |
|
Blue Crystal | ||
| 74 |
|
Purple Crystal | ||
| 75 |
|
Green Crystal | ||
| 76 |
|
Red Crystal | ||
| 77 | 
|
Banana | ||
| 78 |
|
Banana Seedling | ||
| 79 | 
|
Fish Stew | ||
| 80 | 
|
Grilled Cheese | ||
| 81 | 
|
Fish Burger | ||
| 82 | 
|
Sashimi | ||
| 83 | 
|
Banana Cake | ||
| 84 | 
|
Potato Croquettes | ||
| 85 |  |
Meat | ||
| 86 | Mushroom | |||
| 87 | Cheeseburger | |||
| 88 | Lasagna | |||
| 89 | Meatballs | |||
| 90 | Garlic Mashed Potatoes | |||
| 91 | Mushroom Burger | |||
| 92 | Cream of Mushroom |
Shops[]
Mine shop[]
Go through the labyrinth in the mine into the big empty area and keep running to the right.Use boat to get across and there will be John, who sells dynamite,clock,chest.
| Image | Name | Price | In-game description | Notes |
|---|---|---|---|---|
|
Clock | $5 | A simple clock that can be used once | Displays the current time of Mycity; can only be used once, then must be bought again. |
|
Dynamite | $150 |
Boom! Rock damage: 0 |
Used for bank robbery (see § Bank robbery). |

|
Chest (golden) | QP$300 | ∅ | Used for storing items (50). |
Market[]
| Image | Name | Price | Energy | Food |
|---|---|---|---|---|
|
Corn Flakes | $80 | 10 | 15 |
|
Milk bottle | $5 | 0 | 1 |
|
Sprite | $25 | 10 | 0 |
|
Fanta | $30 | 15 | 0 |
|
Coca-Cola | $60 | 30 | 0 |
|
Chocolate | $30 | 6 | 2 |
|
Salt | $2 | 1.03 | -15 |

|
Sugar | $3 | 1.03 | 0.11 |

|
Energymax (green) | $25 | 10 | 0 |

|
Energymax (yellow) | $30 | 15 | 0 |

|
Energymax (blue) | $60 | 30 | 0 |
Vehicles[]
At the right side of the bag is available a vehicles button (![]() ). Using this menu, players can spawn vehicles, including the boat obtained through the § Quest 01: Building a boat. The boat shop is in the mine and you need to click to the ladder to exit from there
). Using this menu, players can spawn vehicles, including the boat obtained through the § Quest 01: Building a boat. The boat shop is in the mine and you need to click to the ladder to exit from there
Secret boat shop: Need to have the Lucky flower and the Goldenmare in the inventory, as well as $500,000. Then click on Blank the NPC ,then walk right into the secret shop,and the Bugatti and Yacht will appear.
| Image | Name | Speed | Price | Where is sold | |
|---|---|---|---|---|---|
| Land | |||||
|
Classic XI | 70 km/h | $2,000 | Car Dealership | |

|
Mini Cooper | 90 km/h | $6,000 | Car Dealership | |

|
BMW | 120 km/h | $10,000 | Car Dealership | |

|
Ferrari 488 | 150 km/h | $15,000 | Car Dealership | |

|
Lamborghini | 210 km/h | $45,000 | Car Dealership | |

|
Green Lamborghini | 210 km/h | ∅ | ∅ | |

|
Bugatti | 400 km/h | $500,000 | Secret Boat Shop | |

|
Blue Bugatti | 450 km/h | ∅ | ∅ | |
| Purple Bugatti | 450 km/h | ||||

|
Koenigsegg Agera | 450 km/h | ∅ | ∅ | |
| Huracan Evo | Season 7 win | ||||
| Air | |||||

|
Sleigh | 90 km/h | $20,000 | ∅ | |

|
Broom | 120 km/h | $400,000 | ||

|
Airship | 110 km/h | |||
| Water | |||||

|
Boat | 50 knots | ∅ | ∅ | |
| ∅? | Fishing Boat | 54 knots | $30,000 | Boat Shop | |

|
Patrol Boat | 70 knots | $40,000 | Boat Shop | |

|
Tug Ship | 100 knots | ∅ | ∅ | |

|
Yacht | 200 knots | $500,000 | Secret Boat Shop | |
|
Premium Yacht | 200 knots | Season 5 win |
Potion shop[]
| Image | Name | Price | In-game description |
|---|---|---|---|
|
Shrink Potion | 40 | Use this potion to shrink for 30 seconds! |
|
Growth Potion | 40 | Use this potion to growth for 30 seconds! |
 |
Speed Potion |
50 | Use this potion to walk faster for 30 seconds! |
Café[]
| Image | Name | Price | Energy | Food |
|---|---|---|---|---|
|
|
Coffee | $50 | 25 | 1 |
| Cookies | $100 | 20 | 16 | |
| Waffles | $150 | 28 | 50 | |
|
|
Hot Chocolate | $168 | 14 | 9 |
|
|
Milkshake | $260 | 20 | 17 |

|
Pumpkin Pie | $10 diamond | 102 | 132 |
Pizzeria[]
| Image | Name | Price | Energy | Food |
|---|---|---|---|---|
| TBA | Energymax | $25 | 10 | 0 |
| TBA | Energymax | $60 | 30 | 0 |
| TBA | Energymax | $30 | 15 | 0 |

|
Milkshake | $260 | 20 | 17 |
| Tomato Sauce | $30 | 9 | 6 | |

|
Pizza | $286 | 59 | 60 |

|
Hot Sauce | $30 | 19 | 9 |
Seed store[]
| Image | Name | Price | In-game description |
|---|---|---|---|
|
|
Seed | $50 | A random seed. |
|
|
Fertilizer | $200 | Make seeds grow faster! |
|
|
Water bucket | $80 | Make seeds grow faster! |
| Shovel | $500 | To remove unwanted plants. | |

|
Trunk | QP$5 | |
| Trunk | QP$5 | ||
| Live Fence | QP$5 |
QP (diamond) shop[]
| Image | Name | Level needed | Price (QP$) | Notes | Created by |
|---|---|---|---|---|---|
| Hay | 1 | 5 | ∅ | Iho #5679 | |
| Flower Vase | 2 | 3 | ∅ | ∅ | |
| Shelf | 3 | 5 | ∅ | ∅ | |
|
Hay Wagon | 10 | ∅ | ∅ | |

|
Scarecrow | 10 | ∅ | ∅ | |
| Fence | 5 | ∅ | ∅ | ||

|
Fence (white) | 7 | ∅ | ∅ | |

|
Bush | 2 | ∅ | ∅ | |

|
Broom | 3 | ∅ | ∅ | |
|
|
Super Fertilizer | 6 | 8 | ∅ | ∅ |
| Chest | 5 | 50 | Stores items. | ∅ |
Restaurant QP (diamond)[]
| Image | Name | Price | In-game description |
|---|---|---|---|
| Shelf | $5 | ||
| Shelf | $5 | ||
| Kitchen Cabinet | $7 | ||
| Kitchen Cabinet | $7 | ||

|
Dining Table | $20 | |
| Barbecue Grill | $20 | ||
| Oven | $30 | ||
| Fridge | Free | need finished quest 5 |
Furniture store[]
Chrystian
| Image | Name | Price | Notes | Created by |
|---|---|---|---|---|
| Kitchen Cabinet | $200 | ∅ | ||
| Kitchen Cabinet | $200 | ∅ | ||
| Flower Vase | $80 | Iho #5679 | ||
| Painting | $100 | Iho #5679 | ||
| Painting | $100 | Iho #5679 | ||

|
Sofa | $100 | Iho #5679 | |
| Tv | $300 | Iho #5679 | ||
| TBA | Painting | $100 | ∅ | |
| TBA | Pigeon | $150 | ∅ | |
| TBA | Test Tubes | $150 | ∅ | |
| TBA | Bookcase | $300 | ∅ | |
| TBA | Bed | $500 | ∅ | |
| TBA | Bed | $500 | ∅ | |
| TBA | Bed | $500 | ∅ | |
| TBA | Bed | $500 | ∅ | |
| TBA | Nightstand | $300 | ∅ | |
| TBA | Nightstand | $170 | ∅ | |
| TBA | Armchair | $100 | ∅ | |
| TBA | Sink | $100 | ∅ | |
| TBA | Piggy | $200 | ∅ | |
| TBA | Mirror | $100 | ∅ | |
| TBA | Books | $100 | ∅ | |
| Oven | $600 | For the recipes, see § Oven recipes. | ∅ |
Iho (diamond)
| Image | Name | Price | Notes | Created by |
|---|---|---|---|---|
| Inflatable Duck | QP$10 | Iho #5679 | ||
| Lifesaver Chair | QP$5 | Iho #5679 | ||

|
Cool Box | QP$5 | Iho #5679 | |
| Shower | QP$5 | Iho #5679 | ||
| Flamingo | QP$10 | Iho #5679 |
Dave's Tent[]
You can trade items with Dave, list of items changs everyday. Also some items can be obtained only from Dave (like eggs, garlic, etc.).
Known deals (WIP)
| Image | Item given | Quantity | = | Image | Item received | Quantity |
|---|---|---|---|---|---|---|
|
|
Chocolate Cake | 5 | = |
|
Banana Seedling | 1 |
|
|
Lemon | 3 | = |
|
Banana | 5 |
|
|
Wheat | 15 | = | Egg | 2 | |
|
|
Oregano | 10 | = |
|
Lettuce | 5 |
|
|
Lemon | 2 | = | Egg | 1 | |
|
|
Lemon | 3 | = |
|
Banana | 5 |
|
|
Tomato | 10 | = | 
|
Potato | 5 |
|
|
Pepper | 2 | = |
|
Potato | 1 |
|
|
Oregano | 10 | = |
|
Lettuce | 5 |
|
|
Lemon | 5 | = |
|
Honey | 2 |
|
|
Loaf of Bread | 3 | = |
|
Honey | 2 |
|
|
Tomato | 10 | = |
|
Lettuce | 5 |
|
|
Chocolate Cake | 2 | = |
|
Pumpkin | 1 |
|
|
Grilled Lobster | 3 | = |
|
Banana Seedling | 1 |
|
|
Smolt Fry | 3 | = | Meat | 1 | |
|
|
Banana | 3 | = |
|
Garlic | 3 |
|
|
Cheese | 3 | = | Meat | 1 |
Quests[]
The quests can be accessed by clicking the book (![]() ) at the top-right corner.
) at the top-right corner.
Quest 01: Building a boat[]
Reward: EXP +3000, QP$ +20, Boat becomes available
| № | Description | Tips |
|---|---|---|
| 1 | Talk with Kane | Kane is standing next to Fish 'N Bait |
| 2 | Fish 5 fishes | See § Fisher for info |
| 3 | Talk with Kane | Kane is standing next to Fish 'N Bait |
| 4 | Buy 3 Coca-Cola | See § Market for info |
| 5 | Talk with Kane | Kane is standing next to Fish 'N Bait |
| 6 | Talk with Chrystian | Chrystian is standing next to Bank |
| 7 | Buy a corn flake | See § Market for info |
| 8 | Talk with Chrystian | Chrystian is standing next to Bank |
| 9 | Talk with Kane | Kane is standing next to Fish 'N Bait |
Quest 02: The lost keys[]
Reward: EXP +3000, QP$ +20, Potion shop becomes available
| № | Description | Tips |
|---|---|---|
| 1 | Go to the island | ∅ |
| 2 | Talk with Indy | Indy is standing next to Potion shop |
| 3 | Go to the mine | ∅ |
| 4 | Find Indy's keys | ∅ |
| 5 | Bring the keys to Indy | Indy is standing next to Potion shop |
| 6 | Go back to the mine | ∅ |
| 7 | Find Indy's key | ∅ |
| 8 | Bring the key to Indy | ∅ |
Quest 03: Theft[]
Reward: EXP +3000, QP$ +20
| № | Description | Tips |
|---|---|---|
| 1 | Go to the police station | ∅ |
| 2 | Talk with Sherlock | ∅ |
| 3 | Go to the bank | ∅ |
| 4 | Talk with Colt | ∅ |
| 5 | Go back to the police station | ∅ |
| 6 | Talk with Sherlock | ∅ |
| 7 | Enter in the bank while it's being robbed | See § Bank robbery for info |
| 8 | Look for some clue in the bank | Bank Rob: You need to go on the 2nd floor and use Shrink Potion to go under the table and get the clue lying on the floor |
| 9 | Go to the police station | ∅ |
| 10 | Talk with Sherlock | ∅ |
| 11 | Talk with Indy | ∅ |
| 12 | Go to the Hospital | ∅ |
| 13 | Search for something suspicious in the hospital | Go to the 3rd floor and take the note on the ground |
| 14 | Go to the mine | ∅ |
| 15 | Find the suspect and arrest him | ∅ |
| 16 | Go to the police station | ∅ |
| 17 | Talk with Sherlock | ∅ |
Quest 04: The sauce is gone![]
Reward: EXP +3000, QP$ +20, Pizzeria becomes available
| № | Description | Tips |
|---|---|---|
| 1 | Talk with Kariina | Kariina is standing next to Pizzeria |
| 2 | Go to the island | ∅ |
| 3 | Go to the Seed store | See § Seed store for info |
| 4 | Buy a seed | |
| 5 | Go to your house |
For the next steps you'll need to buy a § House, and a garden bed (house build mode,worth $4,000) |
| 6 |
Plant a seed in your house.
| |
| 7 | Harvest a tomato plant | |
| 8 | Go to the seed store | |
| 9 | Buy a water bucket | |
| 10 | Go to the market | |
| 11 | Buy some salt | |
| 12 | Cook a sauce
(You'll need to use an oven!) |
|
| 13 | Give the sauce to Kariina | |
| 14 | Plant a seed in your house | |
| 15 | Harvest a pepper plant | |
| 16 | Cook a spicy sauce | |
| 17 | Give the spicy sauce to Kariina | |
| 18 | Plant a seed in you house | |
| 19 | Harvest wheat | |
| 20 | Give wheat to Kariina |
Quest 05: Kitchen Nightmares![]
Reward: EXP +3000, QP$ +20, Fridge for your house
| № | Description | Tips |
|---|---|---|
| 1 | Talk to Remi | Remi is at the restaurant on the island |
| 2 | Make Loaf of Bread | For the recipes, see § Oven recipes |
| 3 | Make Salad | |
| 4 | Make Chocolate Cake | |
| 5 | Make Frogwich | |
| 6 | Make Fries | |
| 7 | Make Pudding | |
| 8 | Make Garlic Bread | |
| 9 | Make Fish Stew | |
| 10 | Make Grilled Cheese | |
| 11 | Make Fish Burger | |
| 12 | Make Bruschetta | |
| 13 | Make Lemonade | |
| 14 | Make Pierogies | |
| 15 | Talk to Remi | Remi is at the restaurant on the island |
| 16 | Deliver 20 orders | ∅ |
| 17 | Talk to Remi | Remi is at the restaurant on the island |
Oven recipes[]
Recipes can be accessed and cooked by opening the oven. Each recipe needs some ingredients to be made.
List of recipes[]
| Image | Name | Recipe | ||
|---|---|---|---|---|
|
Fish and Chips
|
|
Wheat Flour | 1 | |
|
|
Fries | 1 | ||
|
|
Cat Fish | 1 | ||
|
Garlic Mashed Potatoes
|
|
Potato | 2 | |
|
|
Milk | 1 | ||
|
|
Salt | 1 | ||
|
|
Garlic | 2 | ||
|
|
Pierogies
|
Egg | 2 | |
|
|
Potato | 2 | ||
|
|
Wheat Flour | 2 | ||
|
|
Salt | 1 | ||
|
|
Cheese | 1 | ||
|
|
Fish Burger
|
|
Cheese | 1 |
|
|
Loaf of Bread | 1 | ||
|
|
Dog Fish | 1 | ||
|
|
Lemon | 1 | ||
|
|
Loaf of Bread
|
|
Salt | 1 |
|
|
Sugar | 1 | ||
|
|
Water bucket | 1 | ||
|
|
Wheat Flour | 1 | ||
|
|
Banana Cake
|
Egg | 2 | |
|
|
Sugar | 2 | ||
|
|
Wheat Flour | 3 | ||
|
|
Milk bottle | 1 | ||
|
|
Banana | 2 | ||
|
|
Salad
|
|
Cheese | 1 |
| Egg | 1 | |||
|
|
Lettuce | 2 | ||
|
|
Tomato | 2 | ||
|
|
Lobster Bisque
|
|
Milk bottle | 1 |
|
|
Lobster | 1 | ||
|
|
Salt | 1 | ||
|
|
Lemonade
|
|
Lemon | 2 |
|
|
Water bucket | 1 | ||
|
|
Sugar | 1 | ||
|
|
Tomato Sauce
|
|
Tomato | 3 |
|
|
Water bucket | 1 | ||
|
|
Salt | 1 | ||
|
|
Bruschetta
|
|
Tomato | 1 |
|
|
Oregano | 1 | ||
|
|
Loaf of Bread | 1 | ||
|
|
Milkshake
|
|
Milk bottle | 1 |
|
|
Blueberries | 1 | ||
|
|
Sugar | 1 | ||
|
Mushroom Burger
|
|
Garlic | 1 | |
| Mushroom | 2 | |||
|
|
Loaf of Bread | 1 | ||
|
|
Grilled Cheese
|
|
Loaf of Bread | 1 |
|
|
Cheese | 1 | ||
|
|
Waffles
|
Egg | 1 | |
|
|
Milk bottle | 1 | ||
|
|
Salt | 1 | ||
|
|
Sugar | 1 | ||
|
|
Wheat Flour | 3 | ||
|
|
Honey | 1 | ||
|
|
Fries
|
|
Potato | 2 |
|
|
Salt | 1 | ||
|
|
Frogwich
|
|
Tomato | 1 |
|
|
Frog | 1 | ||
|
|
Loaf of Bread | 1 | ||
|
|
Grilled Lobster
|
|
Lemon | 3 |
|
|
Lobster | 1 | ||
|
|
Salt | 2 | ||
|
|
Fish Stew
|
|
Lion Fish | 1 |
|
|
Salt | 1 | ||
|
|
Pepper | 1 | ||
|
|
Tomato | 2 | ||
|
|
Milk bottle | 1 | ||
|
|
Garlic | 1 | ||
|
Breaded Cutlet
|
Egg | 2 | ||
| Meat | 2 | |||
|
|
Salt | 1 | ||
|
|
Pepper | 1 | ||
|
|
Garlic | 1 | ||
|
|
Wheat Flour | 1 | ||
|
|
Chocolate Cake
|
Egg | 3 | |
|
|
Sugar | 1 | ||
|
|
Wheat Flour | 3 | ||
|
|
Milk bottle | 1 | ||
|
|
Chocolate | 2 | ||
|
|
Potato Croquettes
|
Egg | 2 | |
|
|
Potato | 3 | ||
|
|
Salt | 1 | ||
|
|
Milk bottle | 1 | ||
|
|
Wheat Flour | 2 | ||
|
|
Cheese | 1 | ||
|
|
Sashimi
|
|
Lemon | 2 |
|
|
Goldenmare | 1 | ||
|
|
Hot Sauce
|
|
Salt | 1 |
|
|
Tomato | 3 | ||
|
|
Water bucket | 1 | ||
|
|
Pepper | 2 | ||
|
|
Cookies
|
|
Sugar | 1 |
|
|
Chocolate | 1 | ||
|
|
Milk bottle | 1 | ||
|
|
Wheat Flour | 1 | ||
|
|
Pizza
|
|
Oregano | 2 |
|
|
Milk bottle | 2 | ||
|
|
Tomato | 2 | ||
|
|
Tomato Sauce | 1 | ||
|
|
Wheat Flour | 1 | ||
|
|
Cheese | 1 | ||
|
|
Pudding
|
|
Milk bottle | 2 |
|
|
Sugar | 1 | ||
| Egg | 3 | |||
|
|
Garlic Bread
|
|
Loaf of Bread | 1 |
|
|
Oregano | 1 | ||
|
|
Garlic | 1 | ||
|
|
Salt | 1 | ||
|
|
Cheese | 1 | ||
|
|
Hot Chocolate
|
|
Chocolate | 2 |
|
|
Milk bottle | 1 | ||
|
Cream of Mushroom
|
|
Milk bottle | 1 | |
| Mushroom | 2 | |||
|
|
Salt | 1 | ||
|
Pumpkin Pie
|
Egg | 2 | ||
|
|
Wheat Flour | 2 | ||
|
|
Pumpkin | 1 | ||
|
|
Honey | 1 | ||
|
|
Sugar | 1 | ||
|
Meatballs
|
Meat | 3 | ||
|
|
Hot sauce | 1 | ||
|
|
Salt | 1 | ||
|
Steak Frites
|
Meat | 2 | ||
|
|
Fries | 1 | ||
|
|
Salt | 1 | ||
|
Lasagna
|
Meat | 2 | ||
|
|
Water bucket | 1 | ||
|
|
Salt | 1 | ||
|
|
Sauce | 1 | ||
|
|
Wheat Flour | 1 | ||
|
|
Cheese | 2 | ||
|
Cheeseburger
|
|
Cheese | 1 | |
|
|
Loaf of Bread | 1 | ||
| Meat | 2 | |||
House[]
An available house location
Houses can be placed and bought by using a menu that appears upon clicking an available house location, on the sign of which "For sale" is written.
Types of houses[]
| Exterior image | Interior image | Name | Price | Available during event |
|---|---|---|---|---|

|

|
Classic House | $2,000 | ∅ |

|

|
Family House | $7,000 | ∅ |

|
|
Haunted House | $10,000 | ∅ |

|
|
Haunted Mansion | $20,000 | Halloween event 2019 |

|

|
Christmas House | $25,000 | Christmas event 2019 |

|
|
Treehouse | $50,000 | ∅ |
|
Modern House | $100,000 | ∅ | |

|

|
Igloo House | $150,000 | Event |

|
|
Snowball House | $200,000 |
|
House locations[]
On all houses their number is written. House #11 is not a player's house but a character's, Oliver's. The list below is from left to right.
| # | At the right of | At the left of |
|---|---|---|
| 1–2 | ∅ | Jason's Workshop |
| 3–4 | Jason's Workshop | Police station |
| 5 | Police station | ∅ |
| 6-7 | Clock tower | Bank |
| 8-10 | Bank | Market |
| 13-16 | "Seeds" (seed store) | ∅ |
Profile[]
Players' profiles can be accessed by using the chat command "!profile" followed by the player's nickname. The profile displays:
- General Data
- Coins
- Spent Coins
- Purchased Houses
- Purchased Vehicles
- Quests
- Quests
- Side Quests
- Quest points
- Jobs
- Cop
- Arrested Players
- Robber
- Robberies
- Fisher
- Fished
- Miner
- Collected Gold
- Farmer
- Crops
- Sales
- Fruits Sold
- Chef
- Cooked dishes
- Fullfiled Orders
- Ghostbuster (Halloween 2019)
- Captured Ghosts
- Cop
- Badges
Energy and food[]
Two stats are displayed at the left side of the screen, below the quest button, energy (![]() ) and food (
) and food (![]() ).
).
If one stat gets to 0, the player is teleported to the hospital to heal, paying a tax of $600, and being unable to move for some time.
Both stats can be regained by using food and drinks. Energy, however, is also regained automatically.


